Amigurumi Christmas Stocking

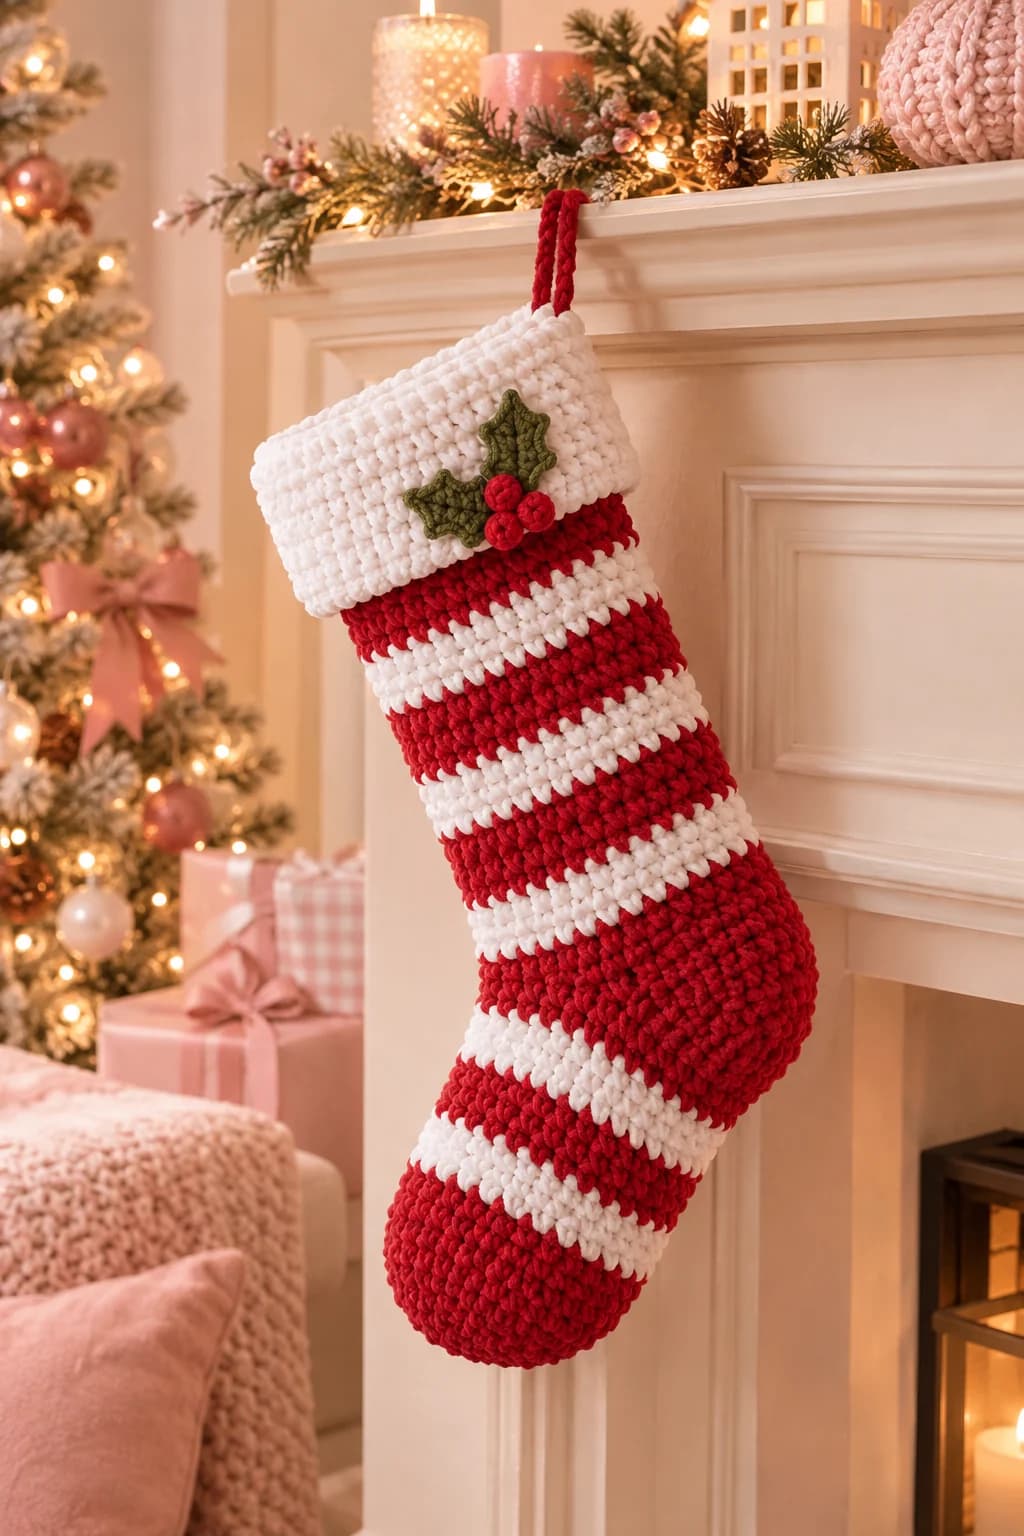
This free amigurumi Christmas stocking crochet pattern makes a plush 16-inch stocking with candy stripes, a thick fold-over white cuff and a little holly sprig. It's worked in one piece from the cuff down, in single crochet rounds, with an afterthought heel that you add at the end. You'll need about 195 yards of super bulky chenille in red and white, a scrap of worsted for the holly, a 6 mm hook and 5 to 6 hours.
Key Takeaways
- One piece, top down: 32 stitches around, joined rounds so the stripes stay straight.
- Afterthought heel: chain across the heel on the way down, then add a round heel at the end.
- Stripes: 3 rounds red, 2 rounds white, repeated down the leg and foot.
- Plush cuff: 14 white rounds, folded in half over the outside.
- Budget ~195 yd (180 m) of chenille: about 100 yd red and 95 yd white.
Why I love this stocking
Chenille turns a plain single crochet stocking into something that looks like velvet. It's soft enough to squish, sturdy enough to fill, and it finishes in one long weekend afternoon. I make one for every new baby in the family, with their initial stitched on the cuff.
It's also the easiest stocking shape I know. There's no heel flap and no gusset. You leave a slot of chains where the heel goes, keep crocheting down to the toe, and come back to add the heel last. It looks like magic, and it's just a toe worked a second time.
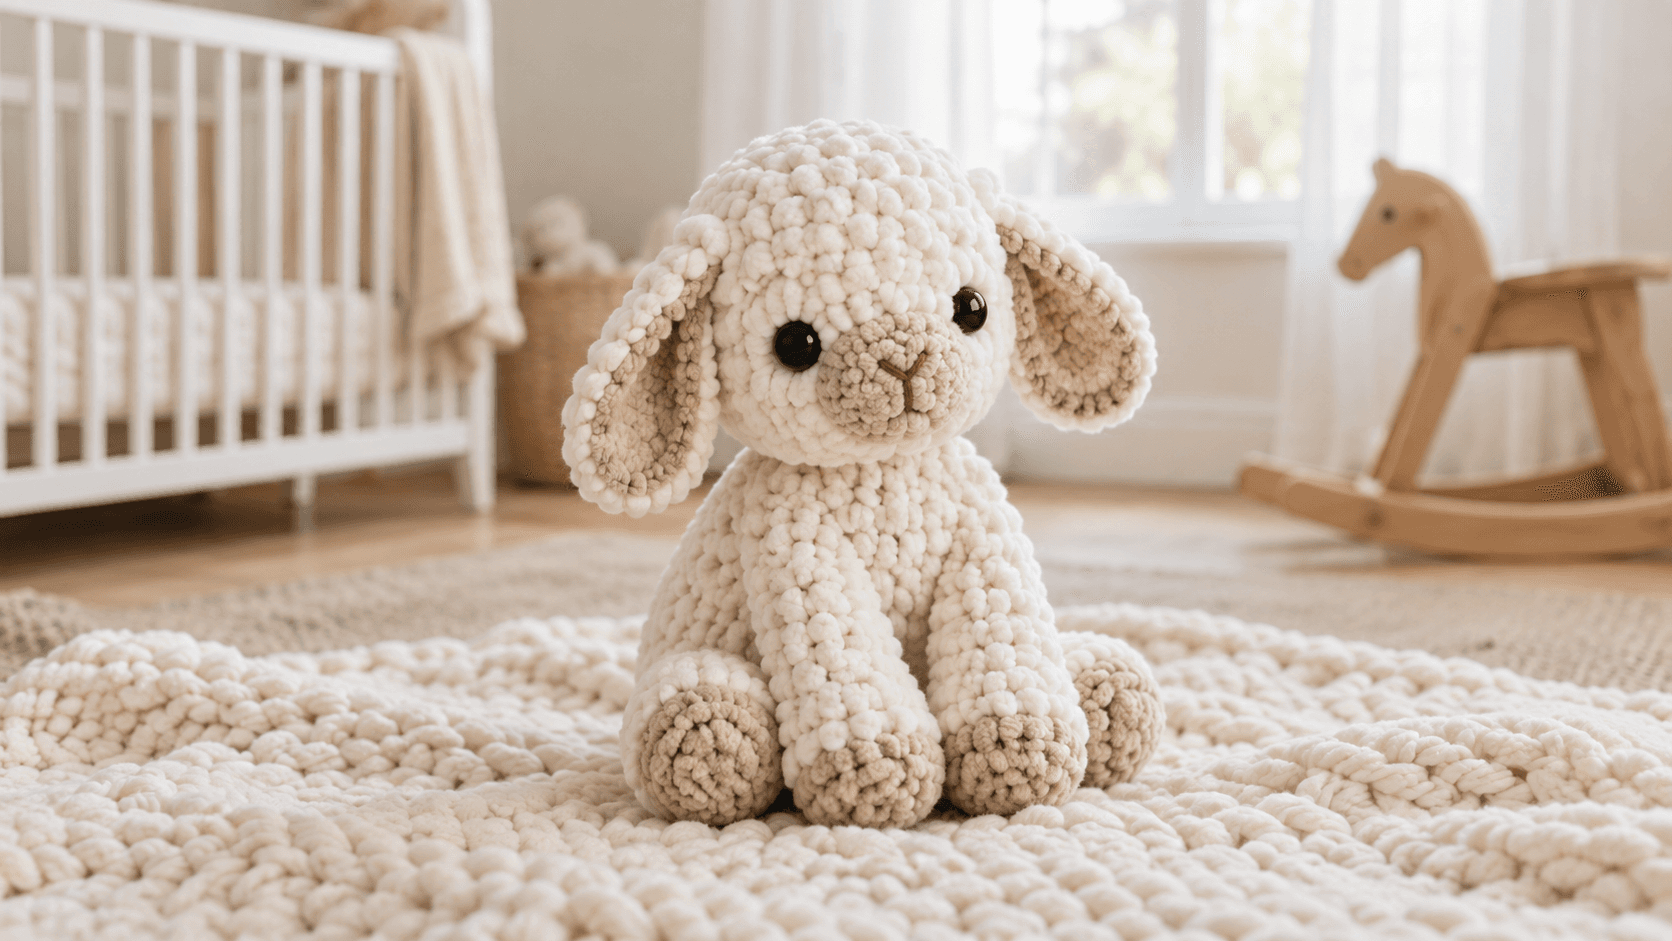
Skill level. Easy. You need a foundation chain in the round, sc, sc2tog and color changes. Chenille hides stitches, so I give you a few tricks for counting below. If you've made my chunky lamb plush, you already know how chenille behaves.
What you'll need
Yarn: super bulky #6 chenille, such as Bernat Blanket (about 220 yd / 300 g per skein). It's soft, doesn't shed much and holds a round shape.
| Color | Used for | Amount |
|---|---|---|
| Red | Leg and foot stripes, heel, toe, hanging loop | about 100 yd (1 skein) |
| White | Cuff, leg and foot stripes | about 95 yd (1 skein) |
| Green worsted #4 | 2 holly leaves | about 8 yd |
| Red worsted #4 | 3 holly berries | about 3 yd |
I counted the stitches to get those amounts: about 1,720 sc in chenille. Plan on 180 to 210 yd in total, depending on your tension.
Hooks and notions
- 6 mm (US J-10) hook for the stocking.
- 4 mm (US G-6) hook for the holly.
- A large-eye tapestry needle, scissors and 2 stitch markers.
Gauge and finished size
With the 6 mm hook, 9 sc and 10 rounds = 4 in (10 cm) in chenille. Chenille can stretch, so crochet firmly. The stocking should stand stiff, not slouch.
Finished stocking: about 16 in (40 cm) tall from the folded top of the cuff to the bottom of the heel, 7 in (18 cm) wide across the leg and about 8.5 in (22 cm) from heel to toe.
Abbreviations (US crochet terms)
- ch = chain
- sl st = slip stitch
- sc = single crochet
- sc2tog = single crochet 2 together
- hdc = half double crochet
- dc = double crochet
- st(s) = stitch(es)
- rnd(s) = round(s)
Joined rounds: Every round ends with a sl st into the first sc, then starts with ch 1 (doesn't count as a stitch). Joined rounds keep the stripes level, with no jog at the color change.
Color change: On the last sl st of a round, pull the new color through instead of the old one. Don't cut the color you're not using. Drop it inside the stocking and carry it up at the join, loosely, until you need it again.
Counting in chenille: Chenille stitches are hard to see. Put a marker in the first sc of every round, and feel for the top "V" with your fingertip rather than looking for it.
UK crocheters: this pattern uses US terms. US single crochet = UK double crochet, US half double = UK half treble, US double = UK treble.
The pieces at a glance
| Piece | Make | Hook | Color |
|---|---|---|---|
| Stocking (cuff, leg, foot, toe) | 1 | 6 mm | white, red |
| Heel | 1 | 6 mm | red |
| Hanging loop | 1 | 6 mm | red |
| Holly leaf | 2 | 4 mm | green worsted |
| Holly berry | 3 | 4 mm | red worsted |
The stripe map, from the top down:
| Section | Rounds | Color | Looks like |
|---|---|---|---|
| Cuff | 1–14 | white | a thick white band, 7 rounds deep once folded |
| Leg | 15–34 | 4 × (3 red + 2 white) | wide red stripes with narrower white ones |
| Leg, above the heel | 35–38 | red | a wider red band that runs into the heel |
| Foot | 39–45 | 2 white, 3 red, 2 white | the stripes carry on along the foot |
| Toe | 46–51 | red | a solid red rounded cup |
| Heel | added last | red | a solid red rounded cup |
The red stripes are always wider than the white ones (3 rounds against 2). That ratio is what gives the candy-stripe look in my photos. The heel and toe are solid red and rounded: never add white to them.
The pattern — step by step
Part 1 — The cuff and the leg
The joins sit at the center back of the stocking, where the heel will go.
Cuff (white):
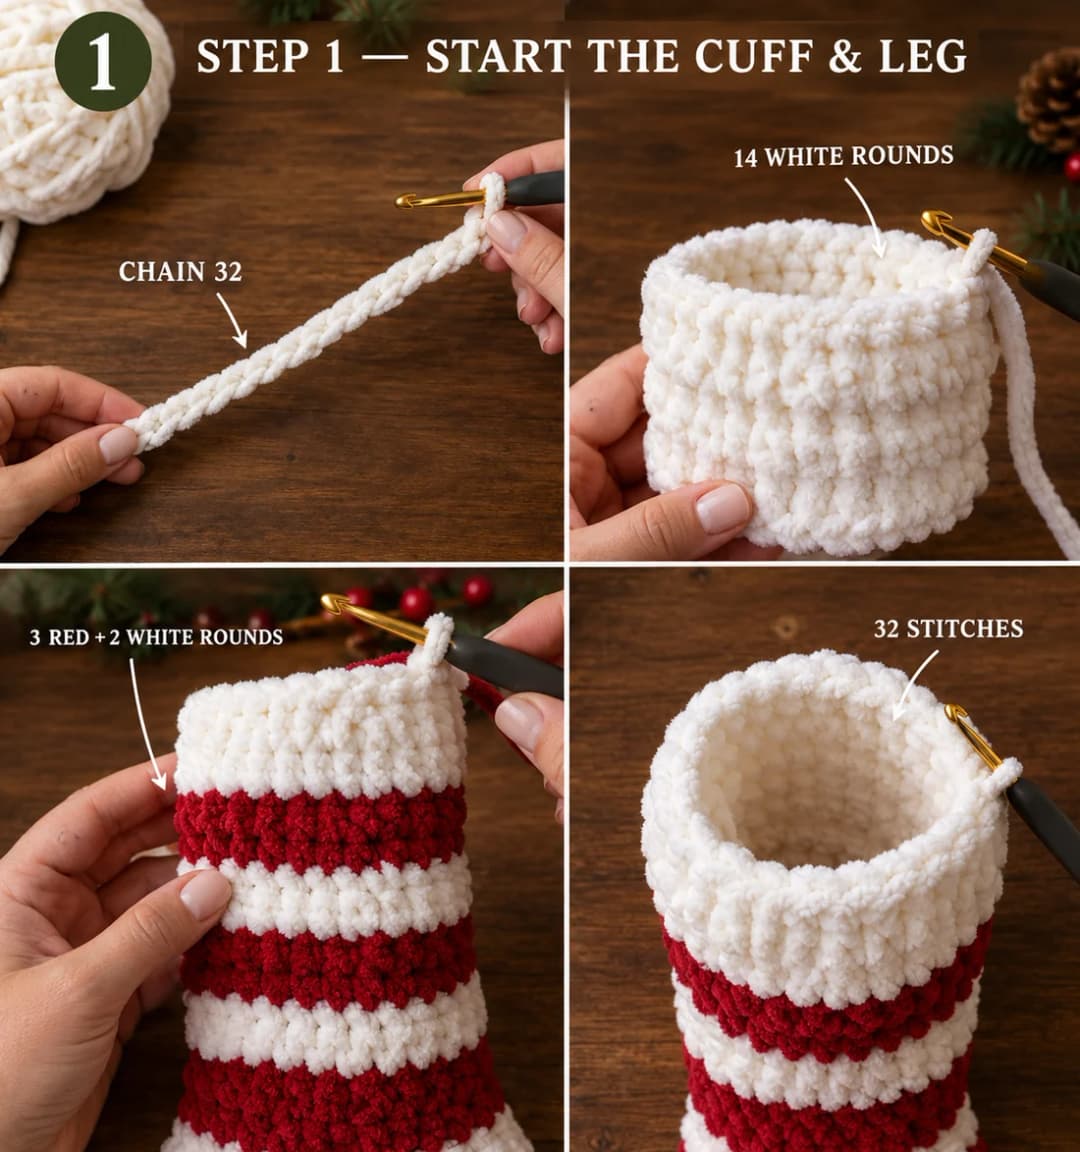
- Foundation: Ch 32. Sl st into the first ch to make a ring. Check that the chain isn't twisted.
- Rnd 1: Ch 1, sc in each ch around. Join. (32)
- Rnds 2–14: Ch 1, sc in each st around. Join. (32) Change to red on the join of Rnd 14.
The cuff is twice as deep as it will look. You'll fold the top half down at the end, in Part 4.
Leg (stripes):
- Rnds 15–17 (red): Ch 1, sc in each st around. Join. (32) Change to white.
- Rnds 18–19 (white): Same. (32) Change to red.
- Rnds 20–34: Repeat the stripe 3 more times: 3 red rounds, then 2 white rounds. (32) Change to red at the end of Rnd 34.
- Rnds 35–36 (red): Ch 1, sc in each st around. Join. (32)
The leg now has the white cuff, 4 red and 4 white stripes, and a wider red band that carries on into the heel round. It should measure about 14.5 in from the top, or about 12 in once the cuff is folded.
Part 2 — The heel opening and the foot
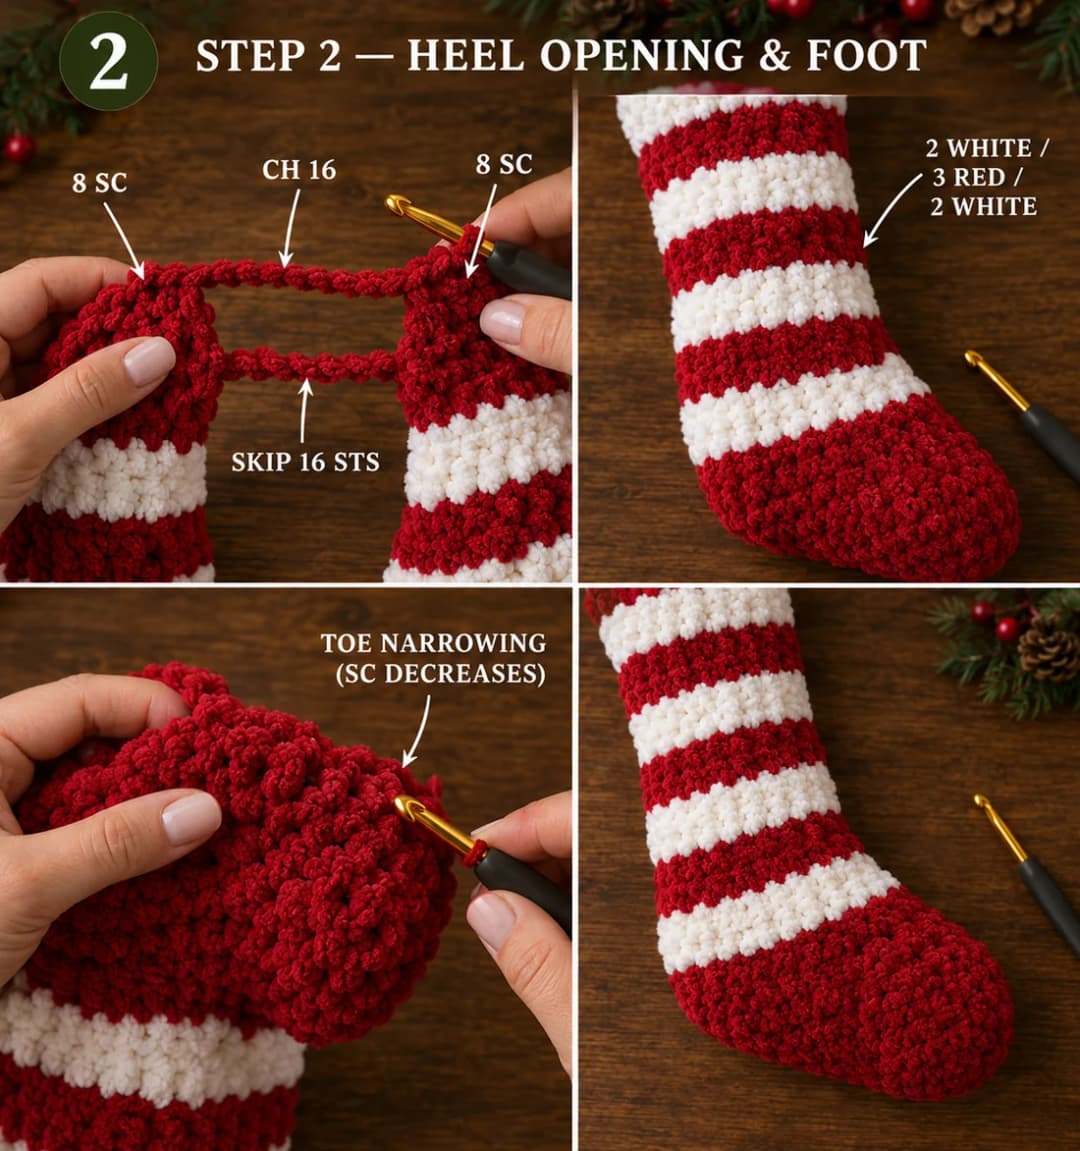
Rnd 37 (red, heel opening): Ch 1, sc in each of the first 8 sts, ch 16, skip the next 16 sts, sc in each of the last 8 sts. Join. The chain bridges the back half of the stocking. That's where the heel goes later.
Rnd 38 (red): Ch 1, sc in each of the 8 sc, in each of the 16 ch and in each of the 8 sc. Join. (32) Change to white.
Foot:
- Rnds 39–40 (white): Ch 1, sc in each st around. Join. (32) Change to red.
- Rnds 41–43 (red): Same. (32) Change to white.
- Rnds 44–45 (white): Same. (32) Change to red. Cut white, leaving a 6-in tail to weave in.
Toe (red):
- Rnd 46: Ch 1, sc in each of the next 6 sts, sc2tog. Repeat 4 times. Join. (28)
- Rnd 47: Ch 1, sc in each of the next 5 sts, sc2tog. Repeat 4 times. Join. (24)
- Rnd 48: Ch 1, sc in each of the next 4 sts, sc2tog. Repeat 4 times. Join. (20)
- Rnd 49: Ch 1, sc in each of the next 3 sts, sc2tog. Repeat 4 times. Join. (16)
- Rnd 50: Ch 1, sc in each of the next 2 sts, sc2tog. Repeat 4 times. Join. (12)
- Rnd 51: Ch 1, sc in the next st, sc2tog. Repeat 4 times. Join. (8)
- Fasten off, leaving an 8-in tail. Weave the tail through the front loop of the last 8 sts, pull it tight to close the toe, and weave it in inside.
Part 3 — The afterthought heel
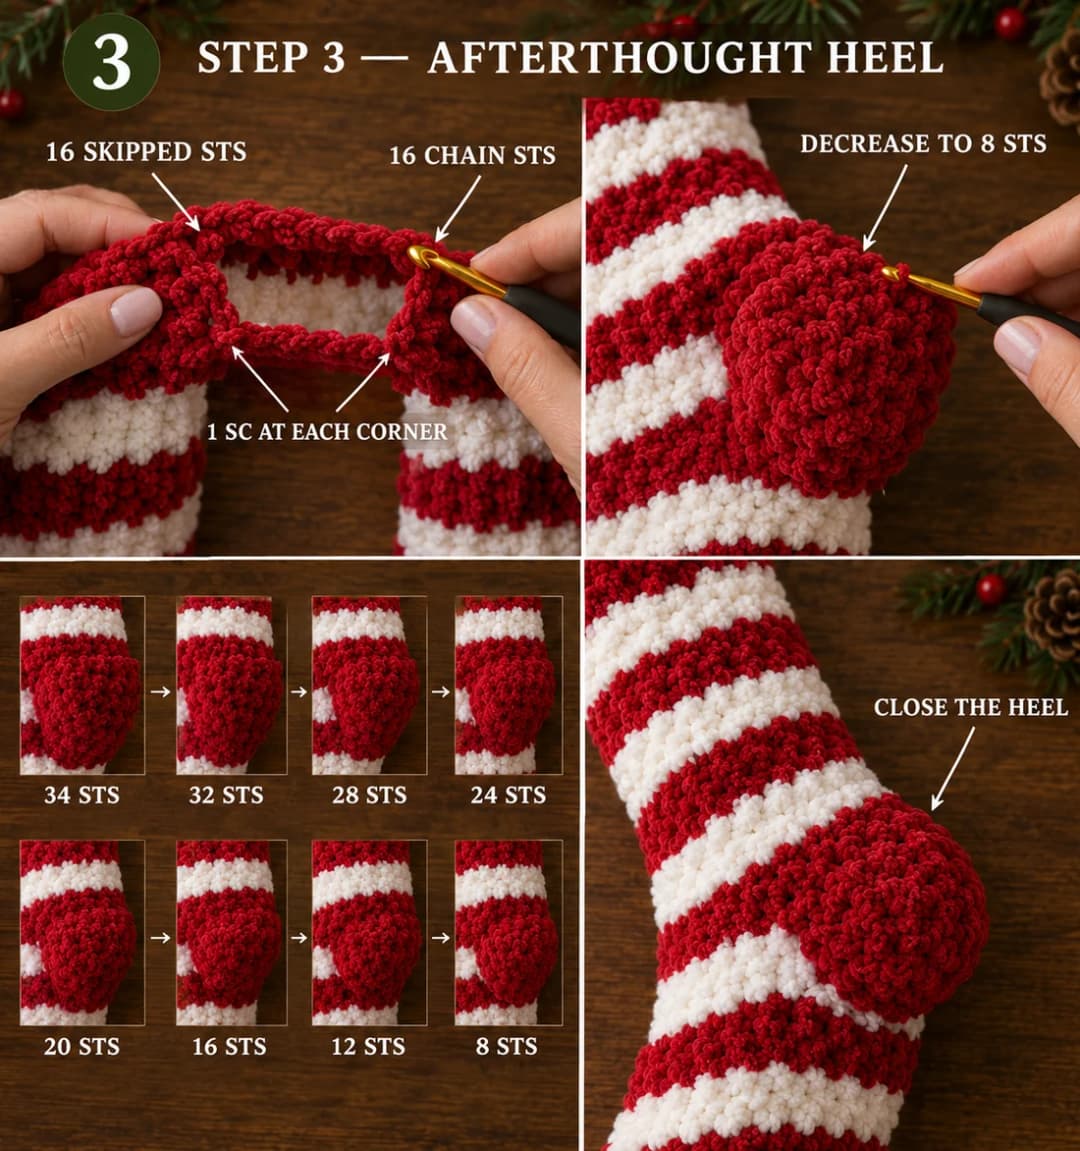
Hold the stocking with the toe pointing away from you and the heel opening facing up. The opening has two edges: the 16 skipped sts of Rnd 36 on the leg side and the 16 chains of Rnd 37 on the foot side.
- Rnd 1: Join red in the first skipped st at one corner. Ch 1. Sc in each of the 16 skipped sts, 1 sc in the gap at the corner, sc in each of the 16 chains (in the loops left at the bottom of the chain), and 1 sc in the gap at the other corner. Join. (34) The corner stitches close the little holes.
- Rnd 2: Ch 1, sc around, working a sc2tog over the 2 sts at each corner. Join. (32)
- Rnds 3–8: Work the 6 toe decrease rounds (Rnds 46–51 of Part 2). (28, 24, 20, 16, 12, 8)
- Fasten off, cinch the last 8 sts closed and weave in the tail inside.
The heel is a solid red, rounded cup, the same shape as the toe. Turn the stocking right side out and push the heel into shape with your fingers.
Part 4 — Fold the cuff, then add the loop and the holly
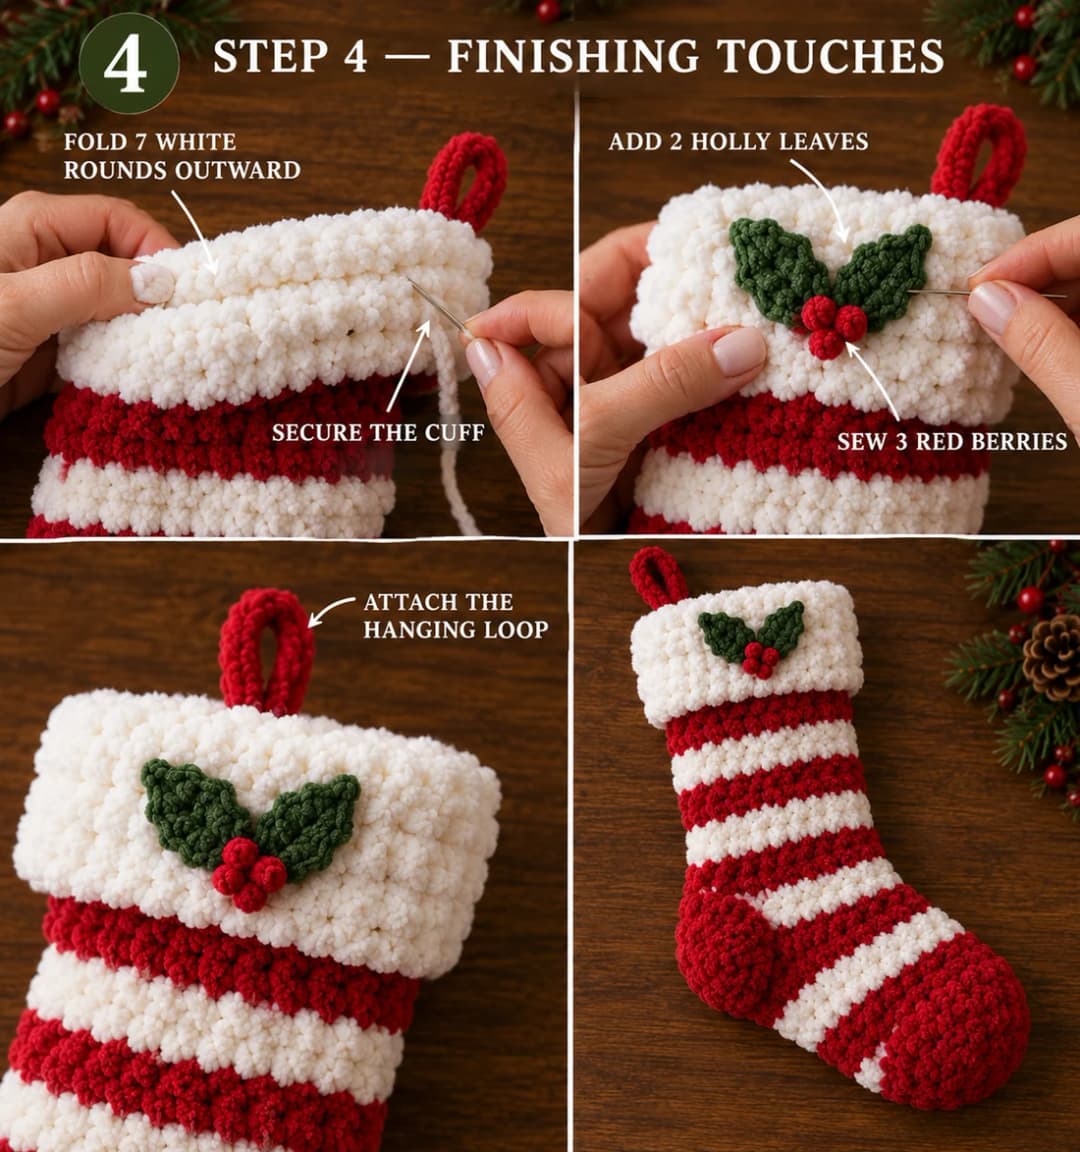
Fold the cuff. Turn the stocking right side out. Fold the top 7 white rounds down over the outside, so the fold sits between Rnd 7 and Rnd 8 and the foundation chain lands right on top of the first red stripe. The cuff is now two layers thick, plush and a little wider than the leg, like the one in my photos. The folded layer shows the inside of the stitches, which looks the same as the outside in chenille. Tack the bottom edge of the fold to the stocking at the center back and at each side, with 2 or 3 small white stitches, so it can't flip up.
Hanging loop (red chenille): Leave an 8-in (20 cm) starting tail. Ch 14 and fasten off, leaving a second 8-in (20 cm) tail. Fold the chain in half and set its two tails at the folded top edge of the cuff, at the center back, where the rounds join. Sew both tails through both layers of the cuff, just below the fold, with at least 10 stitches, and knot them inside. A filled stocking pulls on this seam, so don't skimp. If it stretches over time, run one more tail through.
Holly leaf (make 2, green worsted, 4 mm hook):
- Ch 9. Starting in the 2nd ch from the hook (the tip), work along the chain: sl st, sc, (hdc, ch 3, sl st in the 3rd ch from the hook), dc, (dc, ch 3, sl st in the 3rd ch from the hook), dc, (hdc, ch 3, sl st in the 3rd ch from the hook). In the last ch (the base), work 3 sc.
- Working along the other side of the chain: (hdc, ch 3, sl st in the 3rd ch from the hook), dc, (dc, ch 3, sl st in the 3rd ch from the hook), dc, (hdc, ch 3, sl st in the 3rd ch from the hook), sc, sl st.
- Sl st into the tip. Fasten off, leaving a 10-in (25 cm) tail. Each side has 3 small points.
Holly berry (make 3, red worsted, 4 mm hook): Leave a 6-in (15 cm) starting tail. Ch 3, work 5 dc in the 3rd ch from the hook, drop the loop, insert the hook in the top of the first dc, pick up the dropped loop and pull it through. That's a round bobble. Fasten off, leaving a 6-in (15 cm) tail.
Sew the holly on: The holly goes on the front of the folded cuff, centered or just a little toward the toe side, halfway between the fold and the bottom edge of the cuff. Lay the 2 leaves in a V with their bases touching, pointing up and out. Sew each leaf down around its edge with small stitches, through the folded layer and the layer under it, but never through the back of the stocking. Then sew the 3 berries in a tight cluster over the leaf bases. Pull the tails between the cuff layers and knot them there.
Care and safety. Hand wash in cool water and dry flat. Chenille can "worm" if it's twisted a lot, so press it flat rather than wringing it. The holly berries are small parts, so keep them out of reach of babies, and don't use the stocking as a toy.
Make it yours — quick variations
| Variation | Change from base pattern |
|---|---|
| Name on the cuff | Stitch a name or initial across the folded white cuff with red worsted in backstitch, through the outer layer only, before you sew on the holly. |
| Bigger stocking | Ch 40 instead of 32 and work 5 more leg rounds (one more stripe). In the heel round, sc 10, ch 20, skip 20, sc 10. Start the toe and heel with sc 8, sc2tog (36) and keep taking 4 sts off each round down to 8. Add about 60 yd. |
| Mini ornament | Use worsted cotton and a 4 mm hook with the same counts. It comes out about 8 in tall. Skip the holly or use a single berry. |
| Classic green | Swap white for green chenille, and use a red cuff with white holly berries. |
| Pom-pom cuff | Add a white chenille pom-pom to the front of the cuff instead of the holly. |
Troubleshooting the three things that go wrong
The stripes jog at the back
The rounds weren't joined. Every round needs a sl st to the first sc and a new ch 1. Make the color change on that sl st, not on the last sc.
There are holes at the heel corners
The corners need the extra sc in Rnd 1 of the heel. If a hole is still there, close it from the inside with the heel tail and a couple of stitches.
The stocking looks lumpy
Chenille shows tension changes more than smooth yarn. Crochet at a steady, firm pace, and don't pull the carried color tight at the joins. A light steam from a distance (never touching the iron to chenille) relaxes small lumps.
Frequently asked questions
How long does this Christmas stocking take to crochet? About 5 to 6 hours. The cuff and leg take about 3 hours, the foot and toe about an hour, and the heel another 30 minutes. The hanging loop and holly add about 45 minutes. Chenille works up fast, so it's a nice weekend project.
How much yarn do I need? About 195 yd (180 m) of super bulky chenille: about 100 yd red and 95 yd white. One 220-yd skein of each color covers the stocking with plenty left over. The holly takes about 11 yd of worsted scraps.
What is an afterthought heel? It's a heel you add after the rest of the stocking is done. While crocheting the leg, you chain across the back instead of working into it, which leaves a slot. At the end, you crochet around that slot and decrease like a toe. It's the easiest heel there is, with no turning rows.
Can I use regular worsted yarn instead of chenille? Yes, with a 5 mm hook and the same counts. The stocking comes out about 11 in tall and looks like a classic crochet stocking rather than a plush one. For a full-size stocking in worsted, use the bigger variation and add a few rounds.
Can I sell stockings made from this pattern? Yes, you're welcome to sell finished stockings made from this free pattern at markets, on Etsy or as gifts. Please credit "Pattern by Wavode" in your listing and link back to this page. What you can't do is republish this write-up or my photos as your own pattern.
Related patterns on Wavode
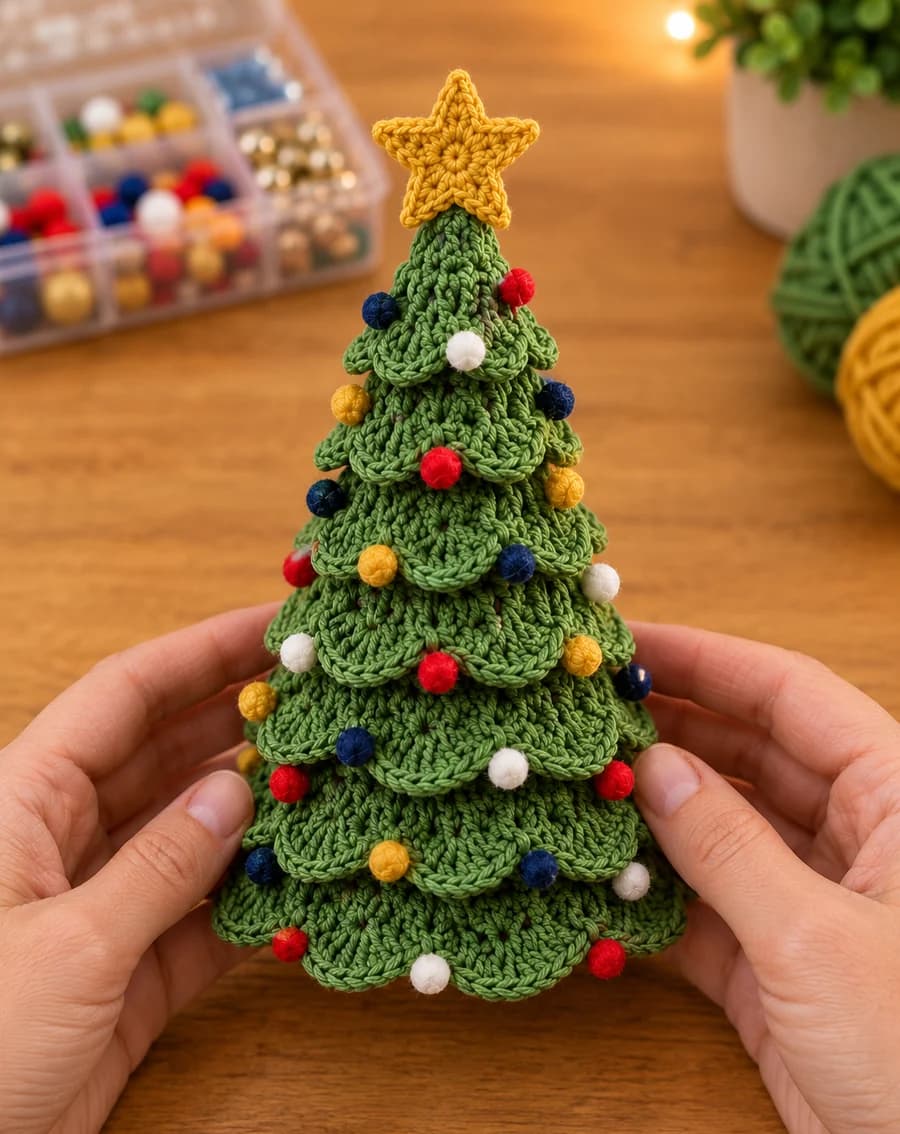
- Crochet Christmas tree decorations: a scalloped tabletop tree with a star and pom-pom baubles.
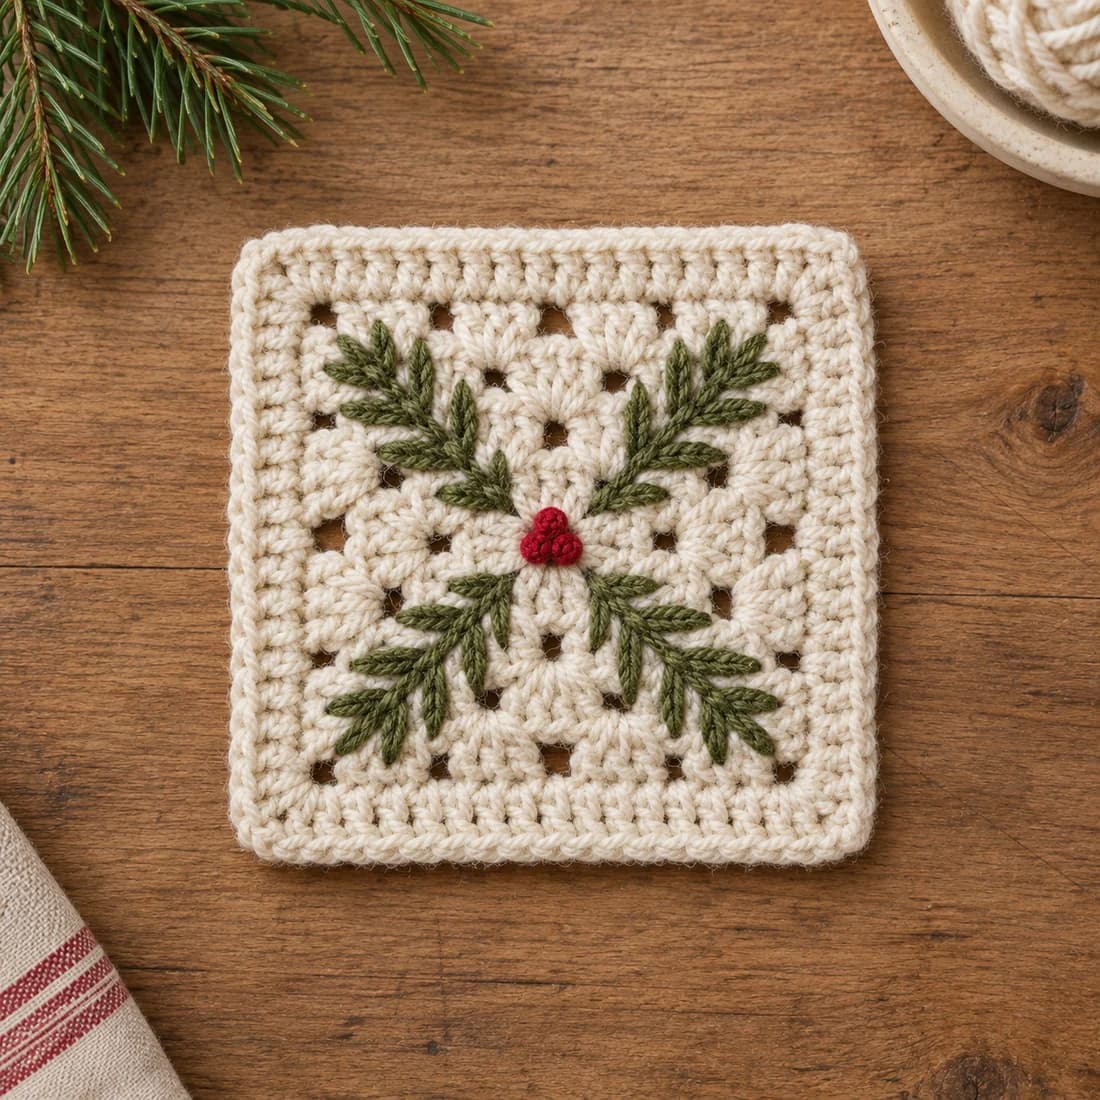
- Christmas granny square: a cream square with stitched pine sprigs and a red berry center.
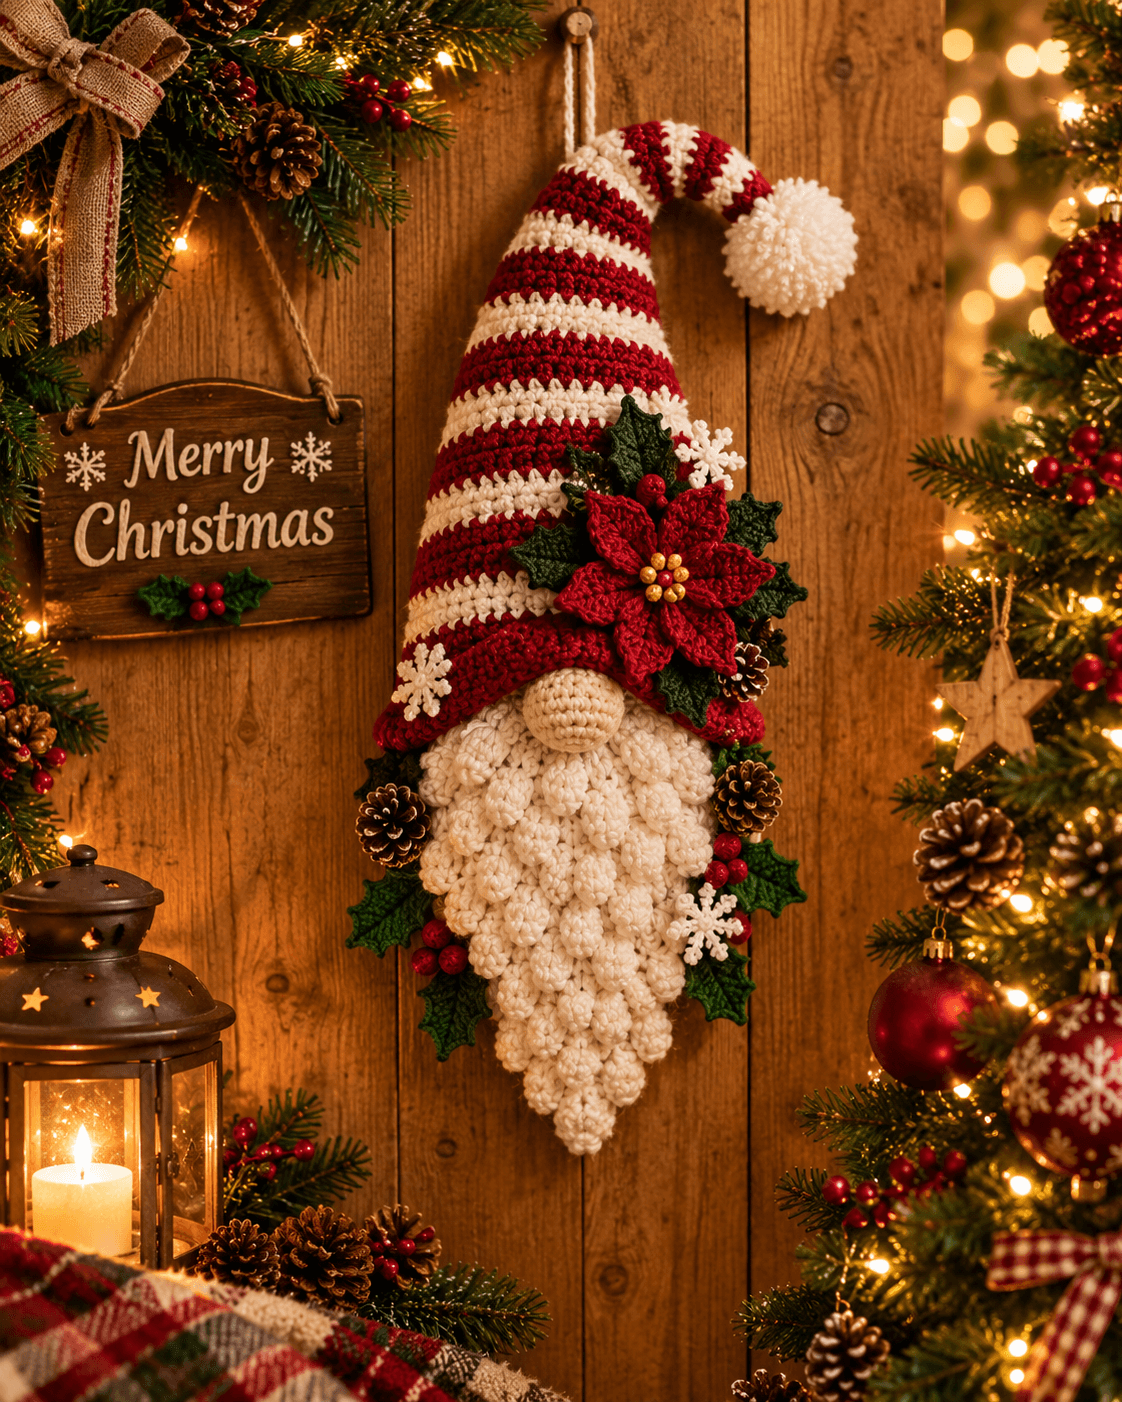
- Crochet Christmas gnome: a bobble-stitch wall hanging with poinsettia trim.
- Chunky lamb plush: another soft chenille project.
Made this stocking? Tag #wavodecrochet on Pinterest. I re-pin every finished make and credit the maker.
Pattern by Clara Hartwell for Wavode. Questions? Email me at support@wavode.com.