Crochet Backpack: Free Pattern with Curved Flap, Pocket, and Adjustable Straps

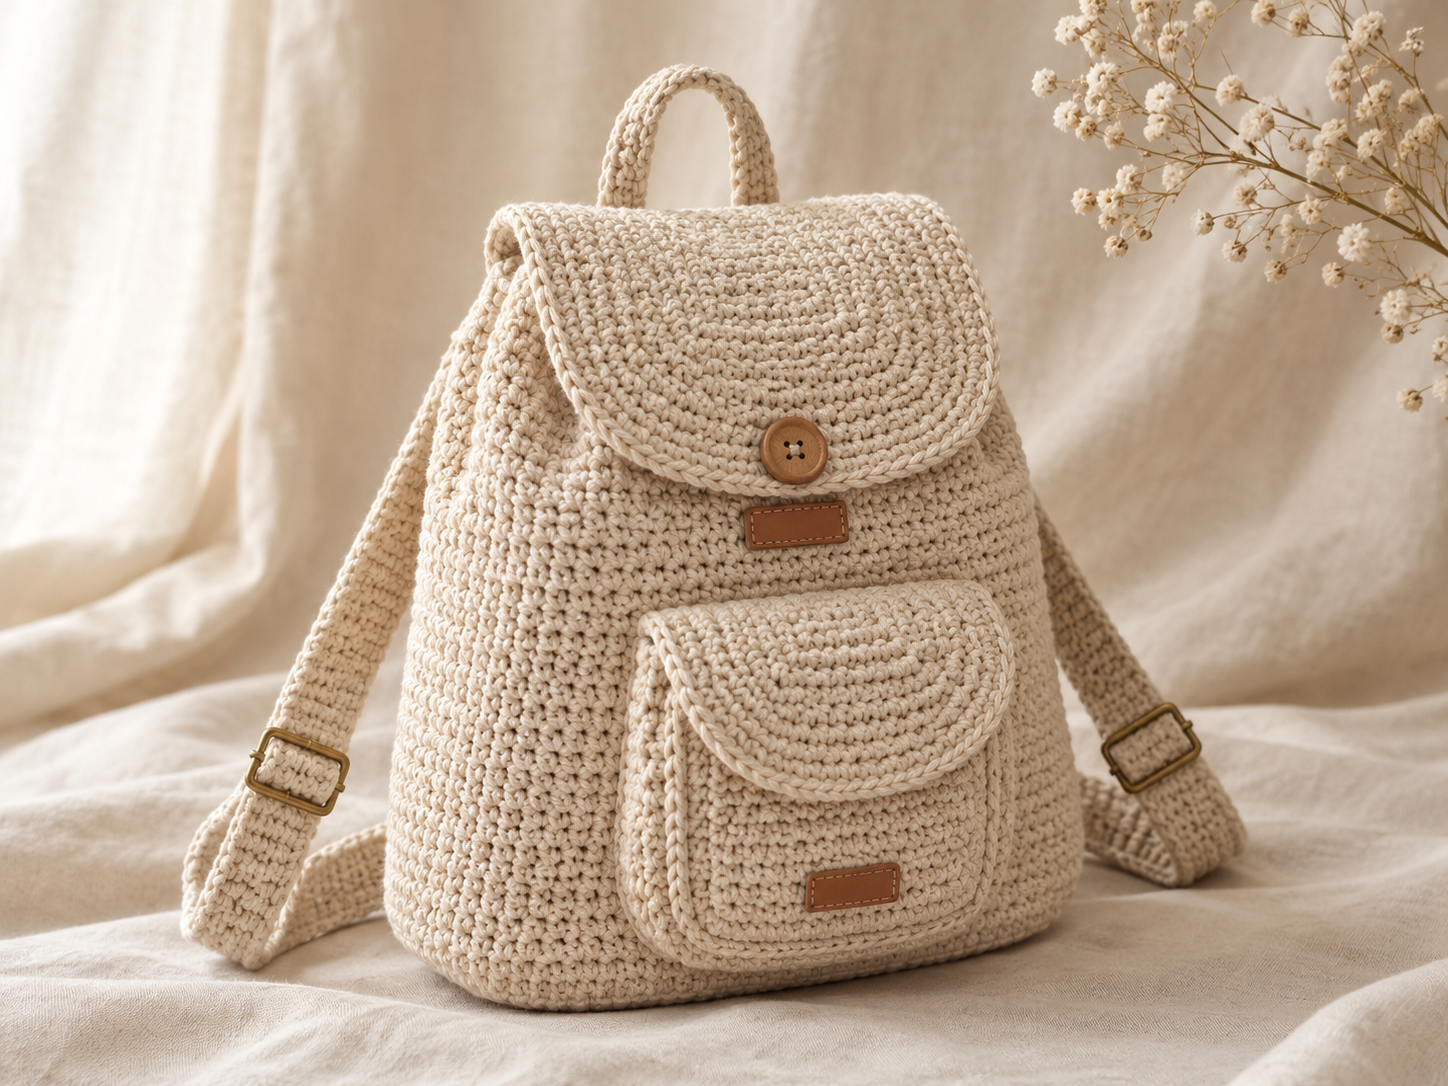
A crochet backpack is a cylindrical drawstring bag worked in the round with a curved fold-over flap, a front pocket, a top loop handle, and two adjustable shoulder straps. This cream cotton version stands about 30cm tall, uses roughly 600m of worsted cotton, and takes around ten hours of hook time once you know the base construction.
I made this backpack twice this summer — once in cream, once in dusty sage — and I've written it out the way I wish someone had written it for me the first time. Every measurement, every stitch count, the leather-tag placement, and the honest bit at the end about the two things I got wrong.
Key Takeaways
- The backpack is a flat circular base + straight walls + drawstring eyelets + curved flap + front pocket + top handle + adjustable straps, worked in a spiral with worsted cotton.
- Craft Yarn Council classes this as a Level 3 Intermediate project: you work in the round without joining, shape a flat circle, and do simple decreases for the flap curve.
- Yarn: about 600m of worsted (#4) cotton for a medium 30cm backpack. That's roughly two skeins of Bernat Maker Home Dec (317 yd / 290 m each).
- Hardware: 1 wooden button (20mm), 2 brass slider buckles (25mm), 2 small leather tags. All of it fits in one small envelope.
- Time: 8 to 12 hours for an intermediate maker; add 2 hours the first time.
What Yarn and Hardware Do You Need for a Crochet Backpack?
You need worsted-weight (#4) or bulky (#5) cotton, about 500–650 metres for a medium 30cm backpack, plus a small hardware kit for the flap closure and adjustable straps. Cotton — not acrylic — because the finished bag needs to hold shape when full and take the weight of a book or a beach towel without stretching into a sad slouch.
The Craft Yarn Council Standard Yarn Weight System puts worsted at 11–14 single crochet per 4 inches, which is dense enough that light doesn't shine through and light enough to work fast. I used Bernat Maker Home Dec — 72% cotton, 317 yards per skein — which gave me one full backpack per skein plus a bit for the straps.
Materials list:
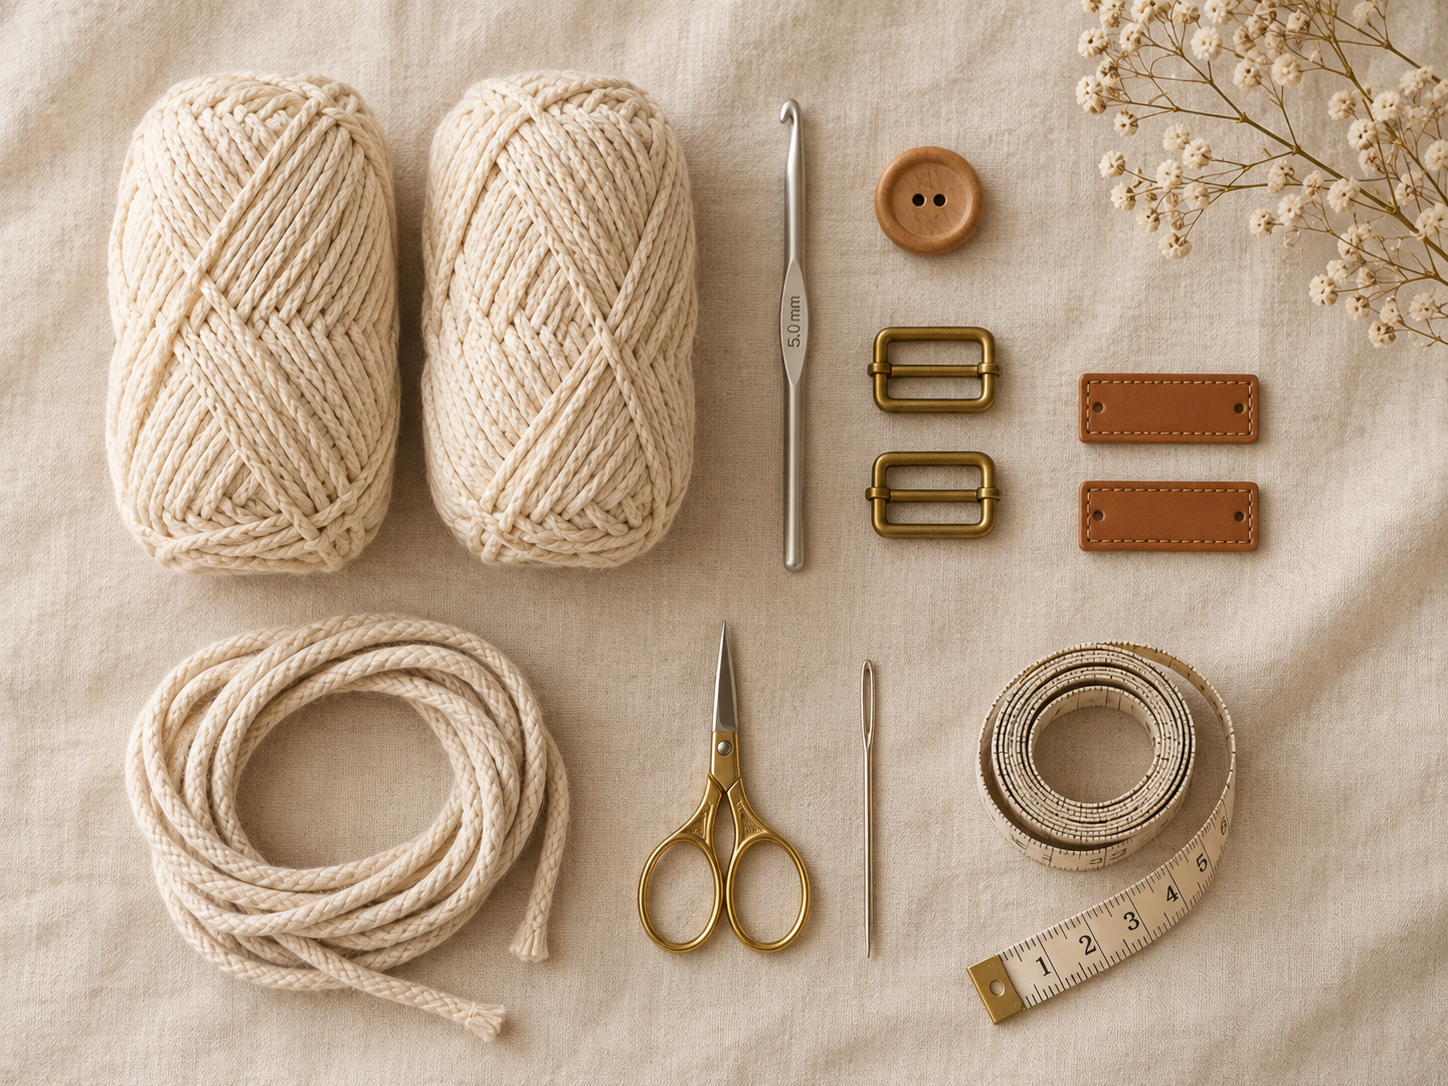
- Main yarn: 2 × 250g skeins of worsted or bulky cotton (Bernat Maker Home Dec, Lion Brand 24/7 Cotton, or Hobbii Ribbon).
- Hook: 5mm (US H/8) for worsted, 7mm (US L/11) for bulky. A tighter tension keeps the bag standing up.
- Tapestry needle for finishing.
- Stitch marker — you'll need one to track the start of each spiral round.
- 1 wooden button, 20mm diameter — the round flat kind with two centre holes, for the main flap closure.
- 2 brass slider buckles, 25mm wide — the classic three-bar sliders that let you adjust strap length. Search "25mm brass strap slider" on Etsy or a haberdashery.
- 2 small leather tags (about 3 × 2cm) — one for the main flap under the button, one for the front pocket. Cut from scrap leather, or buy pre-punched vegan-leather labels. Attach with a hand stitch or two small brass rivets.
- 1m of natural cotton cord for the drawstring (5mm diameter).
- Optional: cotton fabric for lining if you plan to carry a laptop.
For a deeper look at yarn choice for structured bags, see my guide to the best cotton yarn for crochet bags.
How Do You Crochet a Backpack? The Full Free Pattern
The backpack is worked bottom-up in seven parts: a flat circular base, straight walls, an eyelet round for the drawstring, a curved fold-over flap, a front pocket with its own mini flap, a top loop handle, and two adjustable straps. It uses only three stitches: chain, single crochet, and slip stitch.
Stitch abbreviations (US terms): ch chain · sc single crochet · sl st slip stitch · MR magic ring · st(s) stitch(es) · inc increase (2 sc in same st) · dec invisible decrease (see notes below).
Gauge and finished size
- Gauge: 14 sc × 16 rows = 10cm × 10cm in worsted cotton with a 5mm hook.
- Finished size: approximately 25cm wide × 30cm tall × 12cm deep.
- If your gauge is off: backpacks are forgiving. A looser gauge = a slightly bigger bag. Make sure the fabric feels dense enough that light doesn't pass through.
Part 1 — The circular base
Start with a magic ring in your main colour. If magic rings are new to you, see my step-by-step magic ring tutorial.
- Round 1: 6 sc into magic ring. Pull ring closed. (6 sts)
- Round 2: 2 sc in each st around. (12 sts)
- Round 3: [1 sc, inc] around. (18 sts)
- Round 4: [2 sc, inc] around. (24 sts)
- Round 5: [3 sc, inc] around. (30 sts)
- Rounds 6–12: continue the pattern, adding one more sc between increases each round, until you reach 72 sts at the end of Round 12.
Work in a continuous spiral — no joining, no turning. Mark your first stitch of each round.
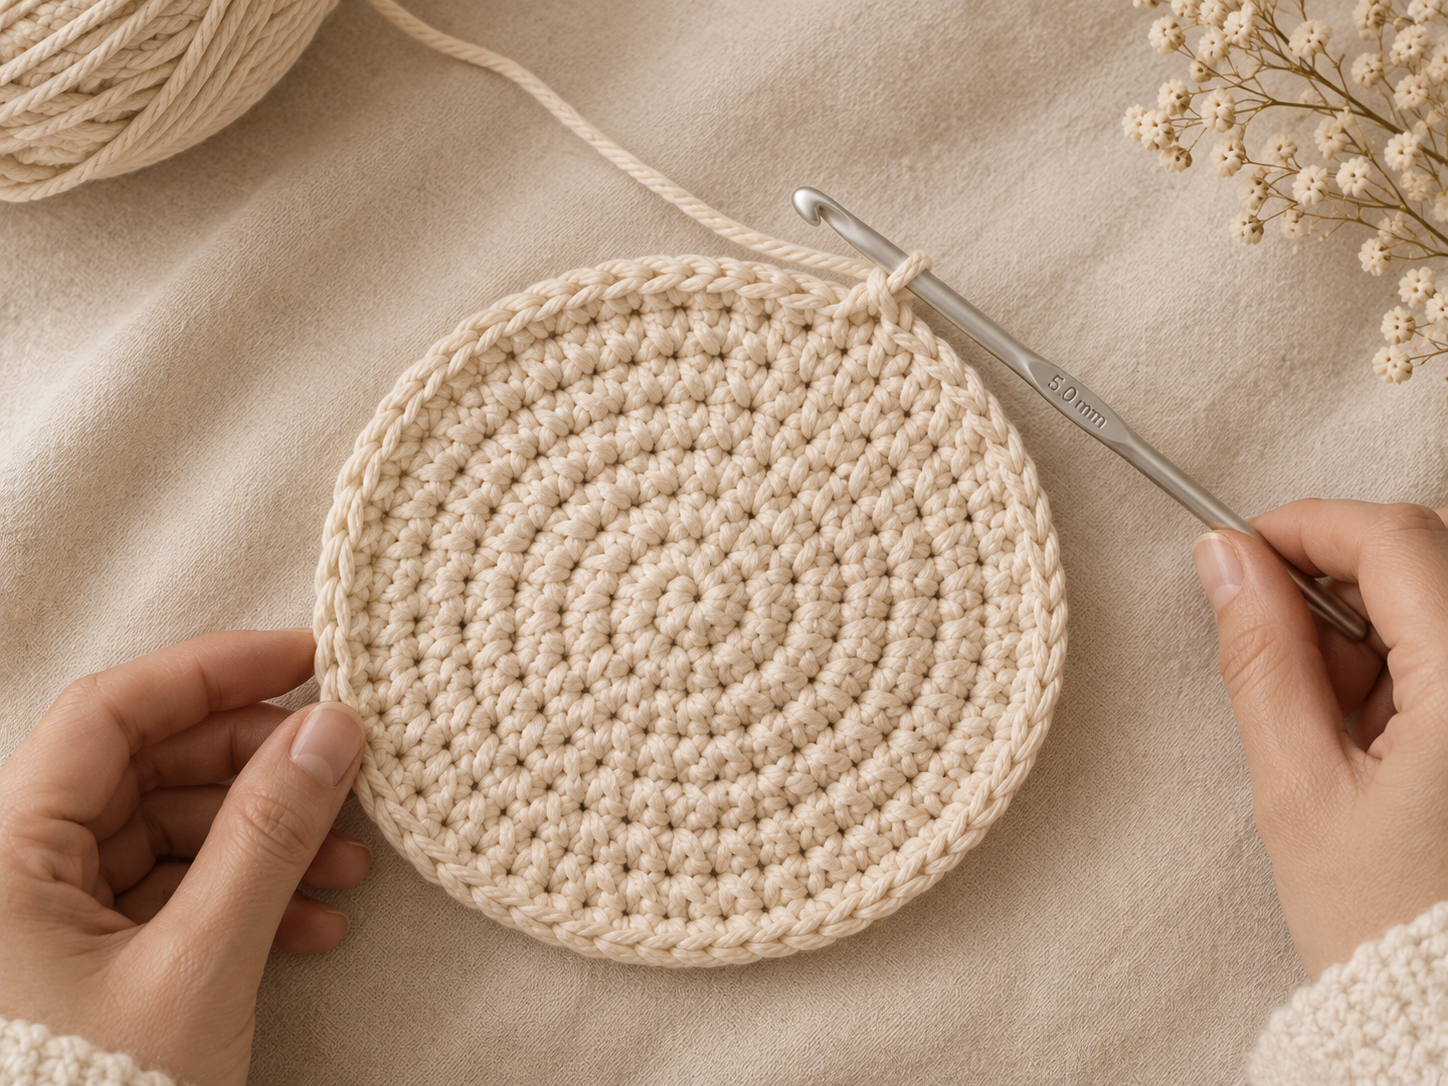
The base should measure about 22cm across when flat. If yours puckers into a bowl, your increases are too tight — try a half-size bigger hook. If it ruffles at the edge, you have too many increases — undo one round and recount.
Part 2 — The straight walls
- Round 13: sc in each st around, working through back loops only. (72 sts) — this creates a crisp fold-line between base and wall.
- Rounds 14–45: sc in each st around, through both loops. (72 sts each round)
Thirty-two rounds of plain sc on top of the back-loop fold round gives you a 20cm-tall wall. For a taller pack, add rounds; for a smaller day-pack, stop at Round 40.
Part 3 — The drawstring eyelet round
- Round 46: [ch 1, skip 1 st, sc in next 5 sts] × 12 times around. (72 sts including 12 ch-1 spaces)
- Rounds 47–48: sc in each st and each ch-1 space around. (72 sts each round)
Twelve evenly-spaced eyelets is the sweet spot. The drawstring cord threads through them; the flap then closes over the top, hiding the drawstring completely — which is why the finished bag reads clean.
Part 4 — The curved fold-over flap
The flap curve is the detail that lifts this bag out of "amateur tote" territory. You work it flat from the back edge, then use invisible decreases at the corners to round the front edge.
How to do an invisible decrease (dec): insert hook under the front loop only of the next 2 sts, yarn over, pull through both loops, yarn over, pull through the remaining 2 loops. It disappears into the fabric — a regular sc2tog would leave a visible lump.
Working flat, back and forth:
- Row 1: with the top-back edge facing, join yarn 21 sts from centre-back. Ch 1, sc in next 42 sts, turn. (42 sts) — this is the width of the flap.
- Rows 2–14: ch 1, sc in each st across, turn. (42 sts each row)
- Row 15: ch 1, dec, sc 38, dec, turn. (40 sts)
- Row 16: ch 1, dec, sc 36, dec, turn. (38 sts)
- Row 17: ch 1, dec, sc 34, dec, turn. (36 sts)
- Row 18: ch 1, dec, sc 32, dec, turn. (34 sts)
- Row 19: ch 1, dec, dec, sc 26, dec, dec, turn. (30 sts)
- Row 20: ch 1, sc 13, ch 4, skip 4 sts, sc 13, turn. — this is the buttonhole for the wooden button.
- Row 21: ch 1, sc in each st and each ch across. (30 sts)
- Fasten off, leaving a 30cm tail.
That gives a flap about 15cm tall with a rounded front edge and a centred buttonhole. Sew the small leather tag centred just below the buttonhole with a hand stitch or brass rivets.
Part 5 — The front pocket with mini flap
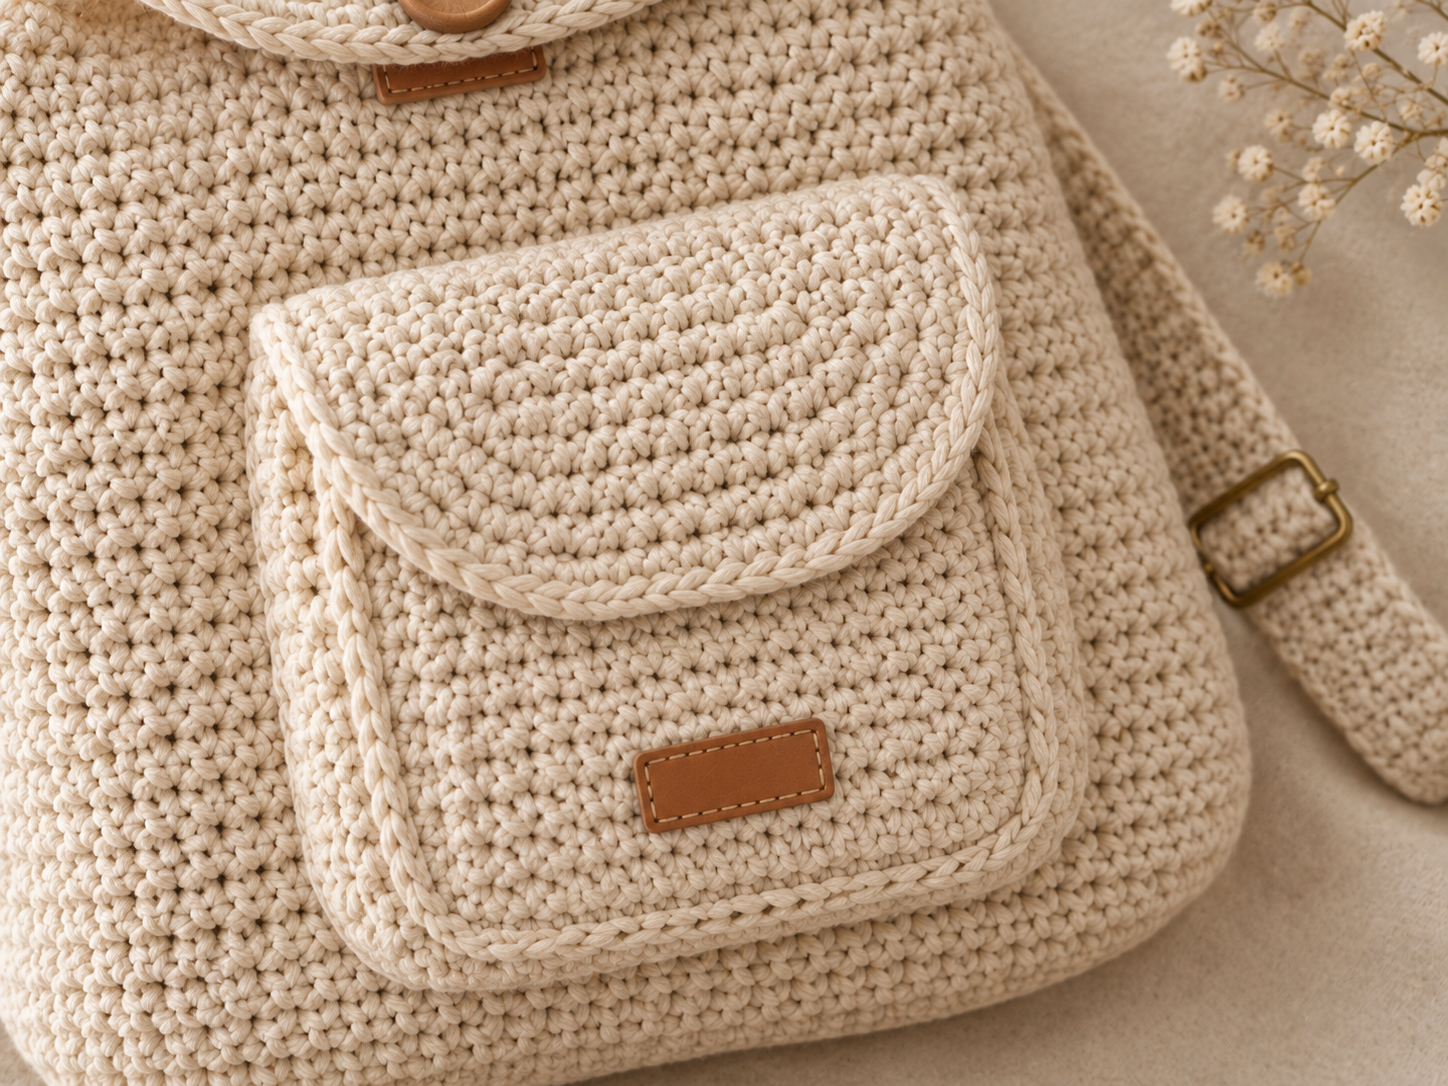
The pocket is a flat rectangle with its own mini curved flap, made separately and sewn onto the front wall of the bag.
Pocket body:
- Row 1: ch 21. Sc in 2nd ch from hook and each ch across. (20 sts)
- Rows 2–14: ch 1, sc in each st across, turn. (20 sts each row)
- Fasten off, leaving a 60cm tail for sewing the pocket to the bag.
Pocket mini flap (worked separately):
- Row 1: ch 21. Sc in 2nd ch from hook and each ch across. (20 sts)
- Rows 2–6: ch 1, sc in each st across, turn. (20 sts each row)
- Row 7: ch 1, dec, sc 16, dec, turn. (18 sts)
- Row 8: ch 1, dec, sc 14, dec, turn. (16 sts)
- Fasten off, leaving a 30cm tail.
Assemble the pocket:
- Position the pocket body centred on the front of the bag, bottom edge about 3cm above the base fold. Sew three sides (bottom + two sides) using the long tail; leave the top open.
- Sew the mini flap's straight edge along the top-back of the pocket so it hangs down over the pocket opening.
- Attach the second small leather tag centred on the mini flap, near the bottom edge.
Part 6 — The top loop handle
The small top handle is what lets you grab the bag off a chair without shrugging it onto your shoulders. Worked separately, sewn on flat.
- Row 1: ch 20. Sc in 2nd ch from hook and each ch across. (19 sts)
- Rows 2–4: ch 1, sc in each st across, turn. (19 sts each row)
- Fasten off, leaving two 15cm tails (one at each end).
Fold the strip into a loop and sew both ends to the top-back edge of the bag, about 3cm apart, right where the flap meets the wall. The loop should stand about 4cm above the bag when finished.
Part 7 — The adjustable shoulder straps with brass sliders
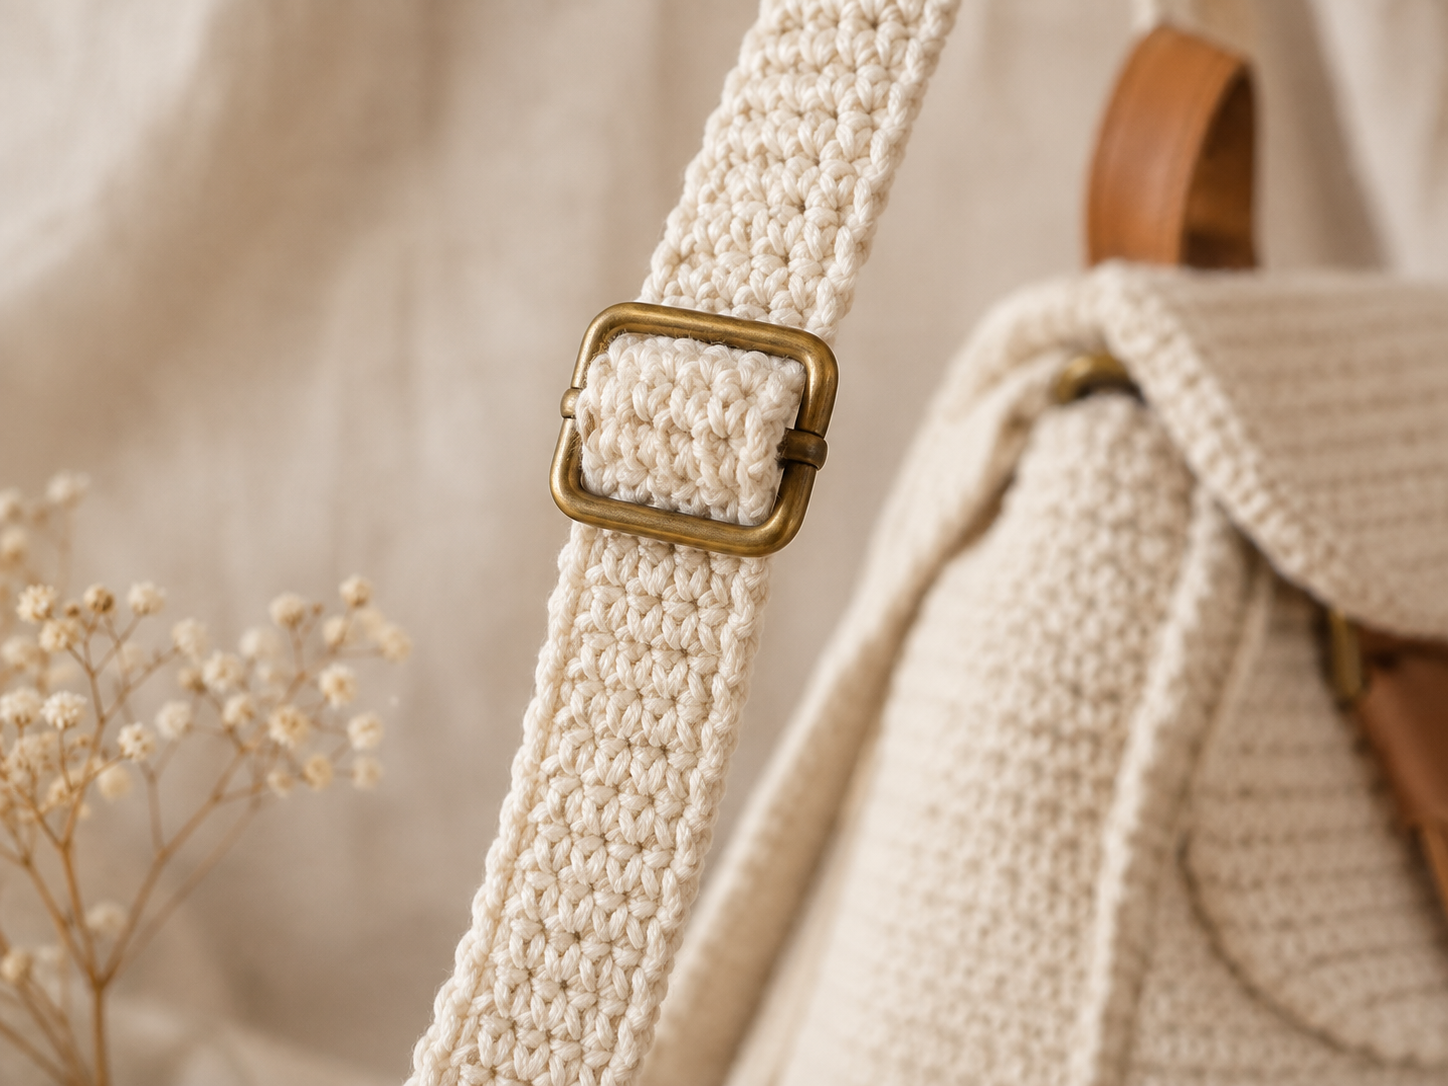
Adjustable straps are what turn a decent bag into a bag someone actually wears. The trick is a strap that threads through a brass slider so you can pull it shorter or let it out for a coat.
For each strap:
- Row 1: ch 90. Sc in 2nd ch from hook and each ch across. (89 sts)
- Rows 2–6: ch 1, sc in each st across, turn. (89 sts each row)
- Fasten off, leaving one 40cm tail at each end.
Assemble each strap with its slider:
- Sew one end of the strap to the top-back edge of the bag, close to where the top handle attaches.
- Thread the free end of the strap up through one slot of the brass slider, over the middle bar, and back down through the other slot.
- Sew the free end to the bottom-back edge of the bag, about 4cm inboard from the side seam.
- To adjust: slide the buckle up the strap for shorter, down for longer.
Repeat for the second strap on the other side of the bag. Weave in every tail. For a stronger strap that doesn't stretch, see my i-cord crochet strap tutorial — swap the flat sc strap for an i-cord and thread it through the same brass slider.
Finishing
- Sew the wooden button onto the front wall of the bag, aligned with the buttonhole on the flap.
- Thread the drawstring cord through the twelve eyelets on Round 46 and knot each end.
- Line the inside with cotton canvas if you plan to carry a laptop — see my guide to lining a crochet bag.
How Much Yarn Does a Crochet Backpack Really Use?
Yardage scales with finished size in a predictable way. A small 25cm day-pack needs about 350–450 metres of worsted cotton; the medium 30cm pattern above needs 500–650 metres; a large 35cm hiking-style pack takes 750–900 metres. The Susanna Winter Crocheted Backpack on Ravelry, a slightly larger version, uses about 1080 metres at 7mm hook. Rachel Choi's Market Tote Bag — same worsted cotton, no straps — anchors the lower end at 435 yards.
Practical implication: buy one extra skein. A dye-lot mismatch on a bag this large is glaring, and cotton yardage varies 5–10% skein to skein. I've been caught twice.
How Long Does It Take to Crochet a Backpack?
For an intermediate crocheter, about 8 to 12 hours of hook time. First-timers working in the round: 14 to 18 hours. Experienced makers batching for markets can hit 5 to 7 hours per bag. My personal average is around 10 hours across two evenings, all seven parts included.
My honest breakdown of a 10-hour build: 2 h base, 4 h walls, 30 min eyelets, 1.5 h curved flap, 1 h front pocket + mini flap, 15 min top loop handle, 1 h two straps, plus finishing and hardware.
The bag is a Level 3 Intermediate by the Craft Yarn Council skill-level system: "projects with involved stitch patterns, colour work, and/or shaping." The shaping here is the flat-circle-to-cylinder transition and the invisible decreases on the curved flap.
What Makes This Crochet Backpack Actually Hold Its Shape?
Three things: dense stitch tension, cotton fibre, and the back-loop-only round that creates a crisp base-to-wall fold. Skip any of them and you get a soft, slouchy tote that looks like it's melting. It's the same reason the Vogue Adria 2026 crochet-bag trend piece singles out structured cotton bags over acrylic — cotton takes and holds a shape.
The hardware finishes the story. Brass sliders and leather tags shift the bag from "handmade craft project" to "handmade craft object", which is the same jump that lets makers sell finished bags at $40–$120 on Etsy versus $15 at a school fair.
Common Mistakes and How to Fix Them
Most first crochet backpacks fail at the base-to-wall transition, at the curved flap decreases, or at strap-slider assembly. All three are recoverable.
The base is puckering into a bowl
Your increases are too tight, or your hook is too small for your yarn. Go up one hook size. If it still puckers, add one extra sc between increases in Round 6 and continue the pattern out from there.
The flap corners look lumpy where the decreases are
You're using a regular sc2tog. Switch to invisible decreases (front loops only, both stitches together). It's the one technique that makes shaped crochet edges look intentional rather than pinched.
The strap keeps sliding through the brass buckle
The buckle's inner width is too big for your strap thickness. Either use a narrower 20mm slider, or fold your strap once through the middle bar before pulling the free end back through the second slot — that friction bite locks the length.
The pocket sags forward off the front of the bag
You only stitched the pocket sides, not the bottom. Sew all three edges (bottom + two sides) with a firm whip stitch through both fabrics. The bottom seam is what carries the weight.
What I got wrong the first time: I used a 6mm hook thinking it would speed things up. The fabric came out gappy and the bag slouched sideways when I put a book in it. Went back to 5mm. Learn from my sloppy first attempt.
Frequently Asked Questions
Is a crochet backpack easy to make? It's an intermediate project — Craft Yarn Council Level 3. You work in the round, shape a flat circle, and use invisible decreases for the curved flap and pocket flap. If you've made an amigurumi body or a hat in the round, you have the base skills. Time: 8–12 hours.
How much yarn do I need to crochet a backpack? For a medium 30cm backpack in worsted cotton, plan on 500–650 metres. That's two 250g skeins of Bernat Maker Home Dec (317 yd each), with the second skein used partially for the flap, pocket, handle, and straps. Buy one extra skein to avoid a dye-lot mismatch.
What is the best yarn for a crochet backpack? Worsted-weight (#4) or bulky (#5) 100% cotton. Cotton holds shape under weight, doesn't fuzz, and washes well. Bernat Maker Home Dec, Lion Brand 24/7 Cotton, and Hoooked Zpagetti T-shirt yarn are the three I'd recommend. Avoid acrylic — it stretches into a slouch within a month.
Where do I buy the brass slider buckles and leather tags? Etsy sells 25mm brass sliders in packs of 4 or 6 for around £4–£6 (search "25mm brass strap slider"). Pre-punched vegan-leather labels come in the same shops. If you have scrap leather, cut 3 × 2cm rectangles and hand-stitch them on — the DIY route costs pennies.
Can I sell backpacks made from this pattern? Yes, you can sell the finished bags. The construction method is a public-domain crochet technique — Etsy listings price the pattern PDF around $4.79–$6.55 and finished bags $40–$120 (retrieved 2026-09-16). What you can't do is republish this specific write-up or my photos.
What's Next?
Once you've made one plain backpack, the natural next step is colour work. A striped body, a contrast flap, or a granny-square front panel all use the same base structure — you just change yarn at the round boundary. For the technique, see my tutorial on changing colour in crochet.
For matching accessories, browse the bags collection — bucket bag, market tote, and mini pouch use the same construction principles at different scales.
If you'd like small-project patterns like this one landing in your inbox each week, join the Wavode letter — one email, Saturday morning, no filler.
Questions about this pattern? Write to support@wavode.com.