Hooded Crochet Baby Romper

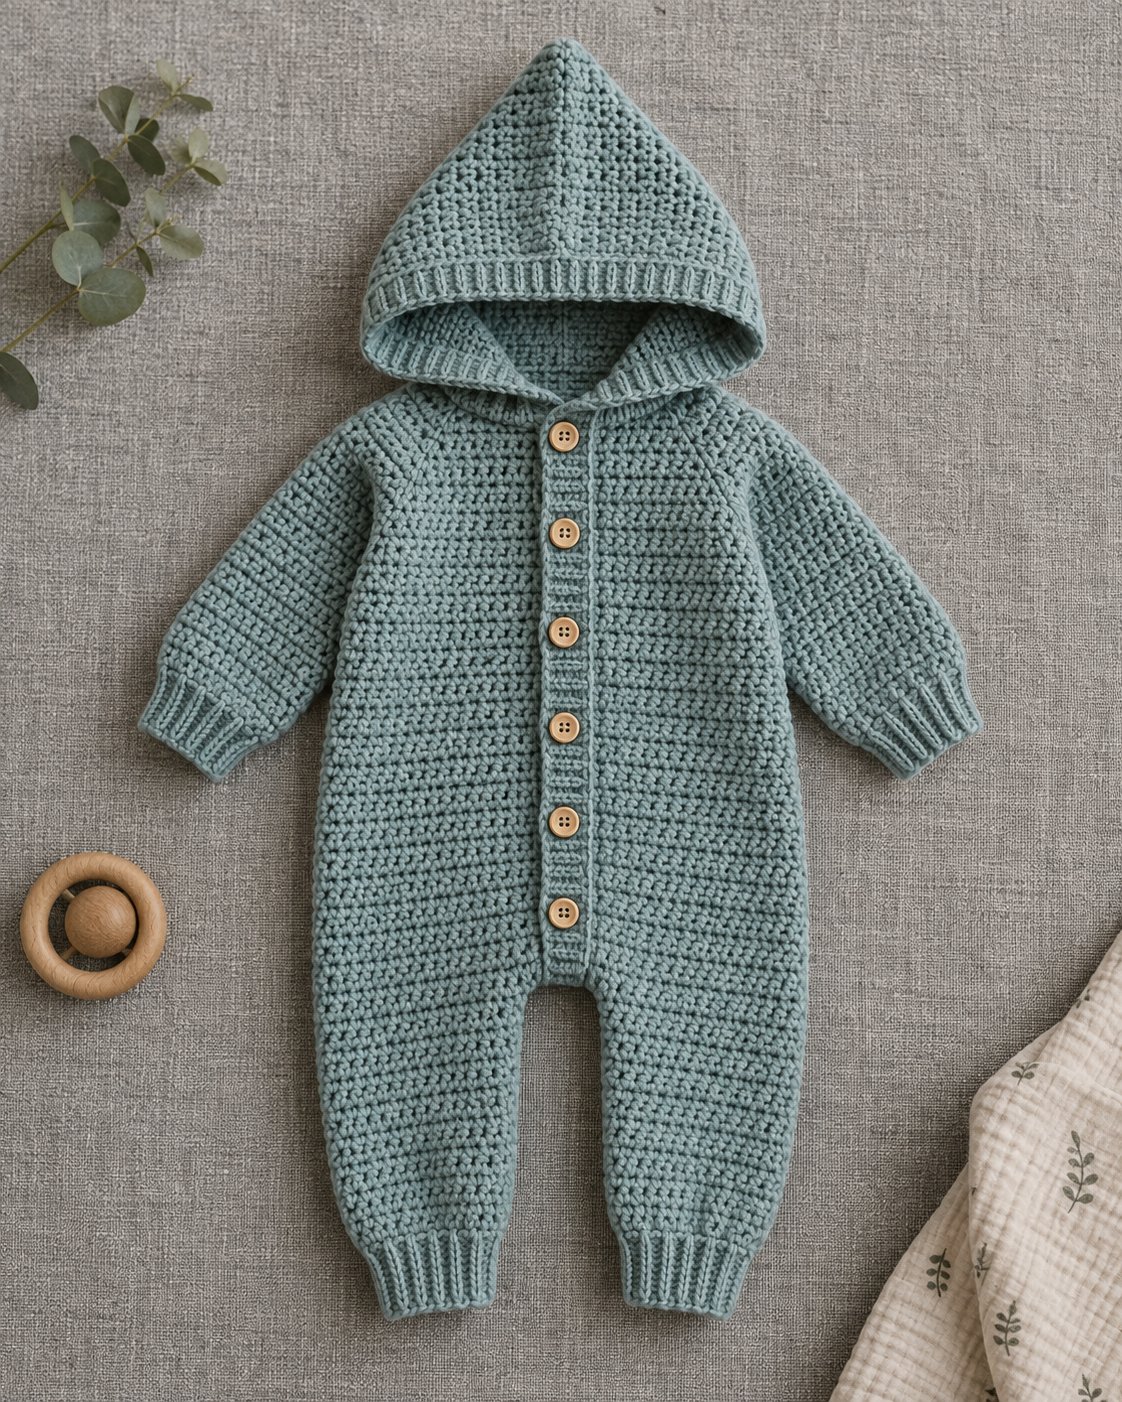
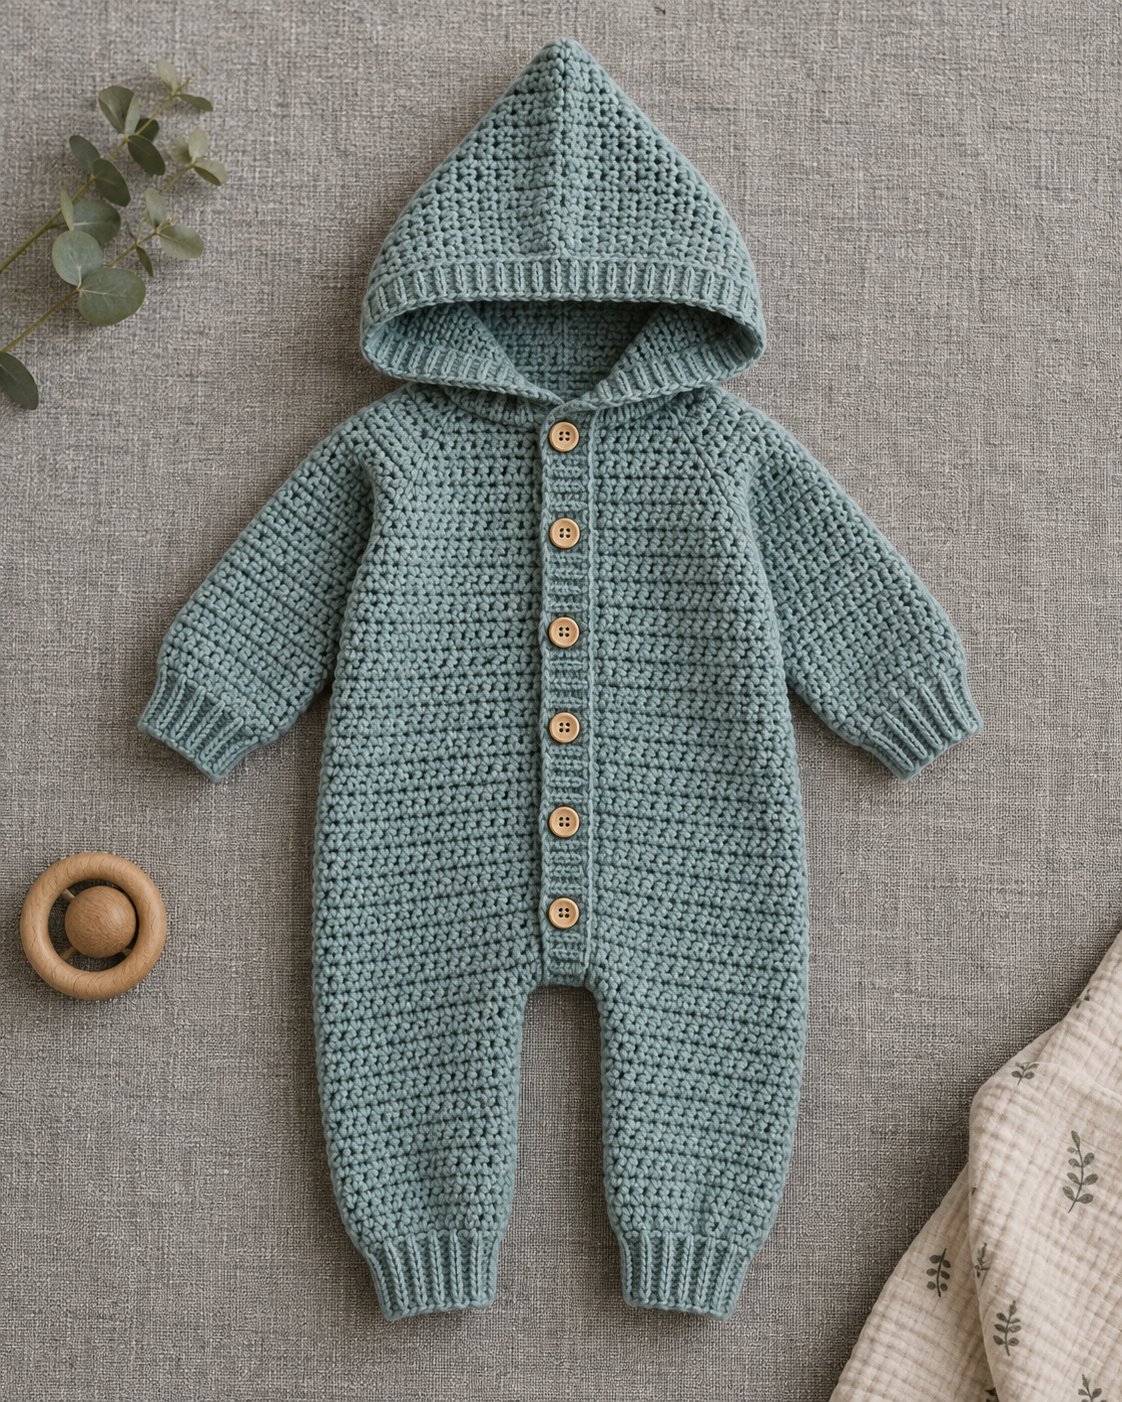
This free hooded crochet baby romper uses DK weight cotton, a 3.5 mm hook, and seven flat pieces seamed together to build the button-front, ribbed-cuff romper that's all over Pinterest baby-shower boards right now. You crochet two leg-backs that join into one back panel, two front panels, two tapered sleeves, and a hood, then finish with a button band up one front edge. Graded in 3 sizes, about 400 yards, 10 to 14 hours across a few evenings.
Pattern at a glance
A hooded, button-front romper in 3 baby sizes (0–3, 3–6, 6–12 months) worked flat throughout in single crochet, with back-loops-only ribbing at every cuff. Two leg pieces join into one back panel at the crotch; two separate front panels widen at the same point and continue straight up to the shoulders, leaving the center front open the whole way for buttons.
No steeks, no in-the-round garment shaping — every seam is a whipstitch you can see and control, which matters a lot on a piece this small.
Why a flat, fully-seamed construction is the right call for a baby romper
Most adult crochet sweaters — mine included — get worked partly in the round for speed. A romper with a full button placket can't take that shortcut: the front opening has to exist from the very first row, not get cut in afterward. So every panel here is worked flat, back and forth, from cuff to shoulder.
That turns out to be a feature, not a compromise. Flat panels are easy to lay side by side and check against each other before you seam anything, which matters enormously at baby scale where a half-inch error is proportionally huge. If you've made my baby socks, the back-loops-only ribbed cuff technique here is identical, just scaled up for a leg and a wrist instead of an ankle.
Skill level. Intermediate beginner. You need chain, single crochet, single crochet decreases, back-loops-only ribbing, buttonhole loops, and whipstitch seaming. No raglan shaping, no in-the-round garment construction.
A safety note about the buttons
Buttons on a baby garment are a choking hazard if they come loose — sew every button on far more securely than feels necessary. Use doubled sewing thread, go through each button 8–10 times, and knot deeply on the wrong side. Check buttons before every wear once the romper is in regular rotation, and retire the garment the moment one feels even slightly loose. If the recipient is under 6 months or you'd rather not think about it at all, swap the buttons for sew-on snap fasteners in the same spacing — the button band still looks the same from the front.
What you'll need
Yarn (DK #3 weight cotton, ~350–450 yd total depending on size)
- Sage blue — Paintbox Cotton DK in Sage Green or Dusk Blue, Rico Creative Cotton DK in Sage, or DMC Natura Just Cotton DK in Aloe.
- Cotton is the right pick for a garment worn against a baby's skin — breathable, washable, and it holds the ribbed cuffs without stretching out.
Hook
- 3.5 mm (US E-4) — the same hook and gauge as my baby socks pattern, so any swatch practice carries straight over.
Notions
- 7 wooden buttons, ¾ in (or sew-on snap fasteners — see the safety note above).
- Tapestry needle, sewing needle and thread for the buttons.
- 6 stitch markers, measuring tape, small sharp scissors.
Gauge
- 20 sc × 22 rows = 4 in (10 cm) on a 3.5 mm hook in DK cotton — matches my baby socks pattern exactly.
Gauge matters for a wearable. Swatch a 4-inch square before starting; if you're more than a stitch off, adjust your hook size.
Abbreviations (US crochet terms)
- ch — chain
- sc — single crochet
- sc2tog — single crochet 2 together (decrease)
- sl st — slip stitch
- st(s) — stitch(es)
- BLO — back loops only
- rep — repeat
- RS / WS — right side / wrong side
Size chart
| Size | Chest (approx) | Leg length | Body length (crotch–shoulder) | Sleeve length | Total yardage |
|---|---|---|---|---|---|
| 0–3 mo | 16 in | 5 in | 9 in | 6 in | 350 yd |
| 3–6 mo | 17 in | 6 in | 10 in | 7 in | 400 yd |
| 6–12 mo | 18 in | 7 in | 11 in | 8 in | 450 yd |
Instructions below are written 0–3 mo (3–6 mo, 6–12 mo). All measurements are approximate and depend on your tension — swatch first.
The pattern — step by step
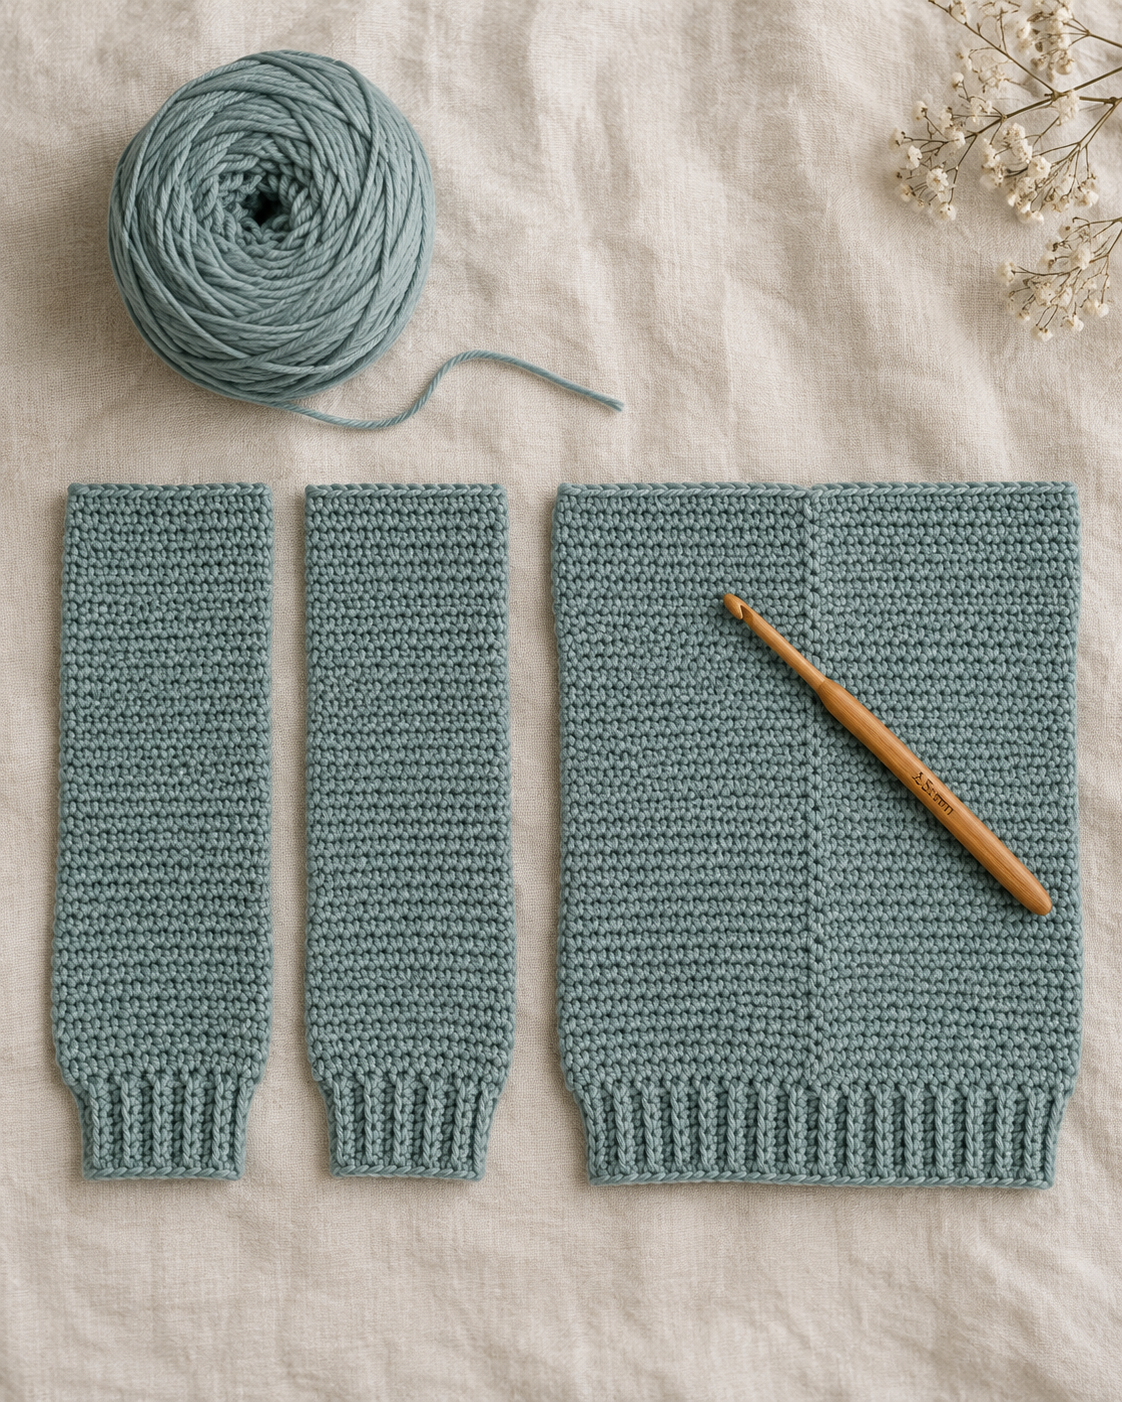
Part 1 — The legs and back panel
Leg back (make 2, identical):
Foundation: Ch 19 (20, 21).
Row 1: Sc in 2nd ch from hook and each ch across. Turn. (18 (19, 20) sc)
Rows 2–6: Ch 1, sc BLO in each st across. Turn. (This is the ribbed ankle cuff.)
Rows 7 onward: Ch 1, sc in each st across (both loops now, regular sc). Turn.
Continue in sc until the piece measures 5 in (6, 7) from the foundation. Fasten off the first leg-back; complete the second identically, but do not fasten off.
Joining row: With the second leg-back's working yarn, ch 1, sc across the second leg-back (18 (19, 20) sc), ch 4 (5, 6) (this is the crotch gusset — it grows with the size), then sc across the first leg-back (18 (19, 20) sc). Turn. This gives 40 (43, 46) stitches across the back panel. The gusset chain is now permanently part of the fabric — every row from here up is worked straight across all 40 (43, 46) sts, with no further gusset shaping needed.
Continue the back panel: Ch 1, sc in each st across (working sc into the gusset chain like any other stitch). Turn. Repeat this row until the back panel measures 9 in (10, 11) from the crotch join. Fasten off, leaving a 12-inch tail.
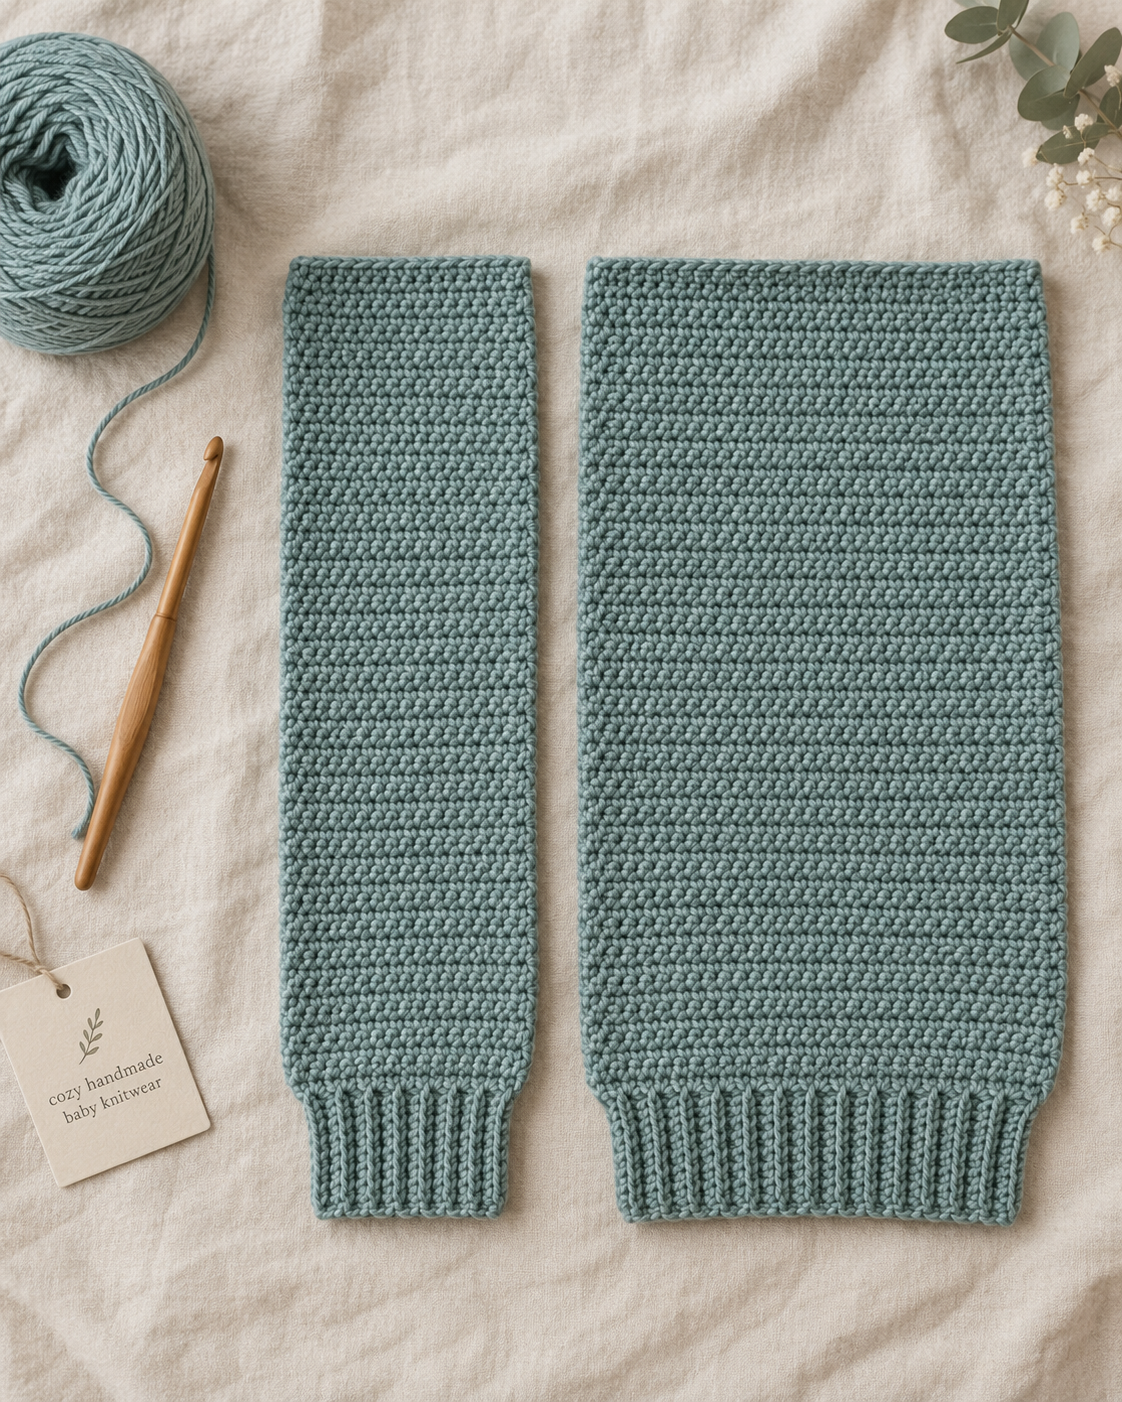
Part 2 — The two front panels (make 2, mirror images)
Each front panel is one leg (front half), which then widens by 2 stitches at the crotch level to match the fuller torso shape you can see in the reference photo — a baby romper's body sits noticeably wider than its legs, and this increase row is what creates that shape. The two front panels aren't crocheted together here — but unlike the back, their inner (leg) edges below the widening row do get seamed to each other in Part 5, closing the front of both legs. Only the torso portion, above the widening row, stays open for the button placket.
Foundation: Ch 19 (20, 21).
Row 1: Sc in 2nd ch from hook and each ch across. Turn. (18 (19, 20) sc)
Rows 2–6: Ch 1, sc BLO in each st across. Turn.
Rows 7 onward: Ch 1, sc in each st across. Turn.
Continue in sc until the piece measures 5 in (6, 7) — the same leg length as the back.
Widening row (torso start): Ch 1, 2 sc in the first st, sc across to the last st, 2 sc in the last st. Turn. (20 (21, 22) sc). The side seam in Part 5 is worked row-to-row against the back panel regardless of stitch count on either side, so this widening doesn't complicate the seam — it just adds the extra torso room the leg alone doesn't need.
Continue straight in sc at the new stitch count until the whole piece measures 14 in (16, 18) total from the foundation — that's leg length plus body length combined. Fasten off, leaving a 12-inch tail.
Repeat for the second front panel. Both fronts should be identical — they become mirror images only once you seam them onto opposite sides of the back.
Check your total before moving on: back panel + both front panels should add up to 80 (85, 90) sts at the torso — 40 (43, 46) back + 20 (21, 22) + 20 (21, 22) front. At this pattern's gauge, that's the 16 in (17, 18) chest measurement from the size chart.
My finding: I write "identical" on purpose here, not "mirrored." Because the ribbing and stitch pattern are symmetric front to back, you genuinely crochet the same instructions twice and let the seaming decide which one sits on the left. Trying to mirror the crochet itself just adds a chance to miscount.
Part 3 — Sleeves (make 2, tapered)
Worked top-down, same tapering logic as my striped sweater sleeves, scaled to baby size.
Foundation: Ch 21 (23, 25).
Row 1: Sc in 2nd ch from hook and each ch across. Turn. (20 (22, 24) sc)
Rows 2–3: Ch 1, sc across. Turn.
Sleeve taper: Beginning at Row 4, decrease 1 sc at each end of every 4th row (Rows 4, 8, 12...) by replacing the first and last sc of that row with sc2tog. Repeat 4 (4, 5) times total, until 12 (14, 14) sc remain.
Work straight (no more decreases) until the sleeve measures 5 in (6, 7) from the foundation — this is the length before the cuff.
Cuff: Ch 1, sc BLO in each st across for 6 rows (about 1 in). This is the ribbed wrist cuff, and it's what brings the sleeve to its full length: 6 in (7, 8) total from shoulder to wrist, matching the size chart.
Fasten off, leaving a 14-inch tail. Repeat for the second sleeve.
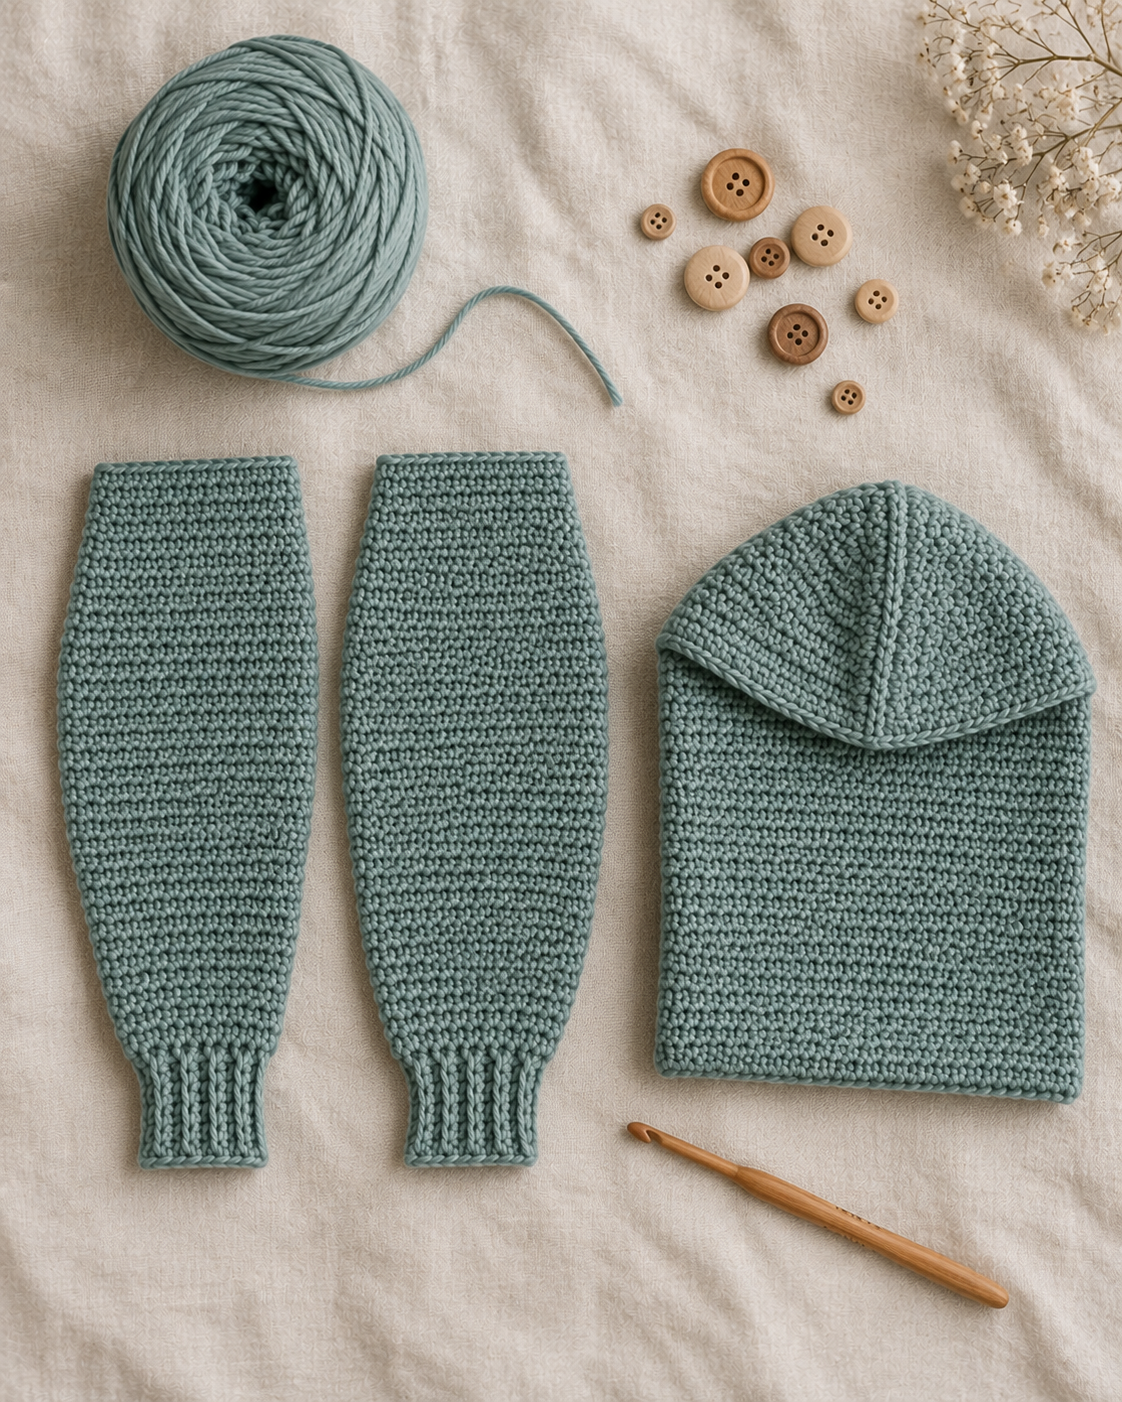
Part 4 — The hood
The hood is one rectangle. Before you start, here's what each part of it becomes, labeled so there's no ambiguity once it's folded:
- Edge A — the foundation chain (the bottom edge as you work Row 1).
- Edge B — the last row you work (the top edge when you fasten off). After folding, Edge A and Edge B sit right next to each other and together form the single neck-attachment edge.
- The two side edges — the row-ends on the left and right as you work. One becomes the back seam, sewn closed along its entire length. The other stays open as the face opening.
- The fold itself — the halfway point of all the rows you work. This becomes the crown, running from the top of the face opening back to the top of the back seam. There's nothing to sew here; the fold does that job on its own.
Foundation: Ch 33 (35, 37) — this is Edge A.
Row 1: Sc in 2nd ch from hook and each ch across. Turn. (32 (34, 36) sc) — at gauge, that's about 6.4 in (6.8, 7.2), a generous width for the neck opening.
Rows 2 onward: Ch 1, sc across. Turn. Continue until the piece measures 12 in (13, 14) from the foundation, ending after a WS row so your last row (Edge B) is a RS row. Fasten off, leaving a 20-inch tail.
Fold at the halfway point of the rows, bringing Edge A down to meet Edge B — the crown forms along this fold automatically. Once folded, the hood measures about 6 in (6.5, 7) from the neck edge (Edge A + Edge B together) up to the crown.
Using the tail, whipstitch up one side edge only, the entire length from the neck edge to the crown fold — about 6 in (6.5, 7), matching the folded depth above. That's the complete back seam, crown to nape. Leave the other side edge open (the face opening), and leave Edge A and Edge B open along the bottom — that combined edge is what you'll pin to the romper's neck opening in Part 5, Step 3. Turn right side out.
Part 5 — Assembly
Six steps, worked in this order.
- Close the legs and sides — three separate seams per leg pairing, in this order:
- Front inseam. Whipstitch the two front panels' inner edges together, starting at one ankle cuff and stitching up to the top of the leg portion — stop exactly at each panel's widening row (Part 2). This closes the front of both legs. Do not continue past the widening row: above it, the two front panels stay open all the way to the neck for the button placket.
- Outseam / side seam, left. Whipstitch the left front panel's outer edge to the corresponding edge of the back panel, starting at the ankle cuff and working up through the hip and torso, leaving the top 4 in (4.5, 5) open for the armhole.
- Outseam / side seam, right. Repeat on the right front panel and the other edge of the back panel.
- Gusset tack. The back's gusset chain is already crocheted into the fabric — it doesn't need its own seam. The only gap left is the single point where the front inseam seam ends and meets the center of the back's gusset row. Take 2–3 whipstitches to tack that one corner closed, and the crotch is fully sealed.
- Set in the sleeves. With the romper right side out, pin each sleeve's wide top edge into an armhole opening, matching the sleeve's center to the shoulder seam point. Whipstitch around.
- Attach the hood. Pin the hood's open bottom edge around the neck opening, centering the back seam of the hood at the center back of the romper. Whipstitch in place.
- Work the buttonhole band. With RS facing, join yarn at the bottom-right front edge (this becomes the right side of the garment as worn). Ch 1, sc evenly up the front edge and around the hood opening. On the way up, work 7 evenly spaced buttonholes: every few stitches, skip 2 sc and ch 2 in their place, then continue sc as normal — the ch-2 space is the buttonhole.
- Work the plain button band. Repeat Step 4 on the left front edge, working plain sc with no buttonholes.
- Sew on the buttons opposite each buttonhole loop, following the safety note above. Weave in every remaining tail.
Finishing touches
- Block gently. Lay the romper flat on a towel, mist lightly with cool water, and ease it into its finished shape while damp. No heat, no iron — DK cotton relaxes into place on its own.
- Check every seam from the inside. A baby romper gets worn against bare skin far more than an adult garment does. Run a finger along every seam and weave down any tail-end that feels rough or poky.
- Try the buttons before the first wear, not after. Fasten and unfasten each one a few times to make sure the loops aren't so tight they'll fray or so loose they'll slip open on their own.
Care instructions
Hand-wash in cool water with a fragrance-free baby-safe soap. Lay flat to dry — never hang, since a wet cotton romper will stretch long from the shoulders. Steam very lightly if the ribbing looks compressed after washing. Check button security at every wash; re-sew at the first sign of looseness.
Troubleshooting
The two front panels come out different lengths. Count rows, not inches, when you're within an inch of the target — cotton DK can compress slightly under tension and throw off a ruler measurement more than a stitch count. Match row-for-row against the back panel.
The buttonhole loops are too loose and buttons slip through on their own. Your ch-2 buttonhole space is too wide for a ¾-inch button. Rework using ch 1 instead of ch 2 for a snugger loop, or size down your buttons.
The armhole gapes at the underarm. You left too many stitches open at the top of the side seam. Reseam, closing another stitch or two at the underarm before setting in the sleeve.
The hood sits too far back or too far forward. The hood's back seam wasn't centered on the romper's center back when you pinned it. Unpick and re-pin, matching the fold line of the hood exactly to the back panel's vertical center.
Frequently asked questions
What size baby does this romper fit? Three sizes cover roughly 0–3, 3–6, and 6–12 months by chest measurement (16–18 in). Babies vary — measure chest circumference over a light shirt if you can, and size up if you're between two sizes, since a slightly roomy romper is easier to dress a wiggly baby into than a snug one.
Is this romper safe for a newborn? With sew-on snap fasteners instead of buttons, yes. With buttons, sew them on with doubled thread through 8–10 passes and check before every wear — see the full safety note earlier in this pattern. Cotton yarn is breathable and machine-washable, both good qualities for newborn skin.
Can I skip the hood? Yes. Skip Part 4 entirely and finish the neckline with a few rounds of BLO sc worked directly around the neck opening for a simple ribbed crew neck instead.
What's the best yarn for a baby romper? DK weight 100% cotton. It's breathable, holds the ribbed cuffs without sagging, and machine-washes cleanly wash after wash. Avoid wool next to newborn skin unless it's specifically labeled superwash and soft enough for baby wear, and skip novelty or metallic yarns entirely.
Can I sell finished rompers made from this pattern? Yes — you're welcome to sell physical rompers made from this free pattern at craft fairs, Etsy, or as gifts. Please credit "Pattern by Wavode" on your listing and link back to this page. What you can't do is republish this write-up or my photos as your own pattern.
Related patterns on Wavode
- Crochet baby socks — the same ribbed-cuff technique and DK cotton gauge as this romper, for a matching set.
- Classic newborn bonnet — if you'd rather a separate hat than the attached hood here.
- Rosebud baby booties — pairs beautifully with the romper for a complete baby-shower gift set.
Made this romper? Tag #wavodecrochet on Pinterest — I re-pin every finished make and credit the maker.
Pattern by Clara Hartwell for Wavode. Questions? Email me at support@wavode.com.