Navy and Cream Striped Crochet Sweater

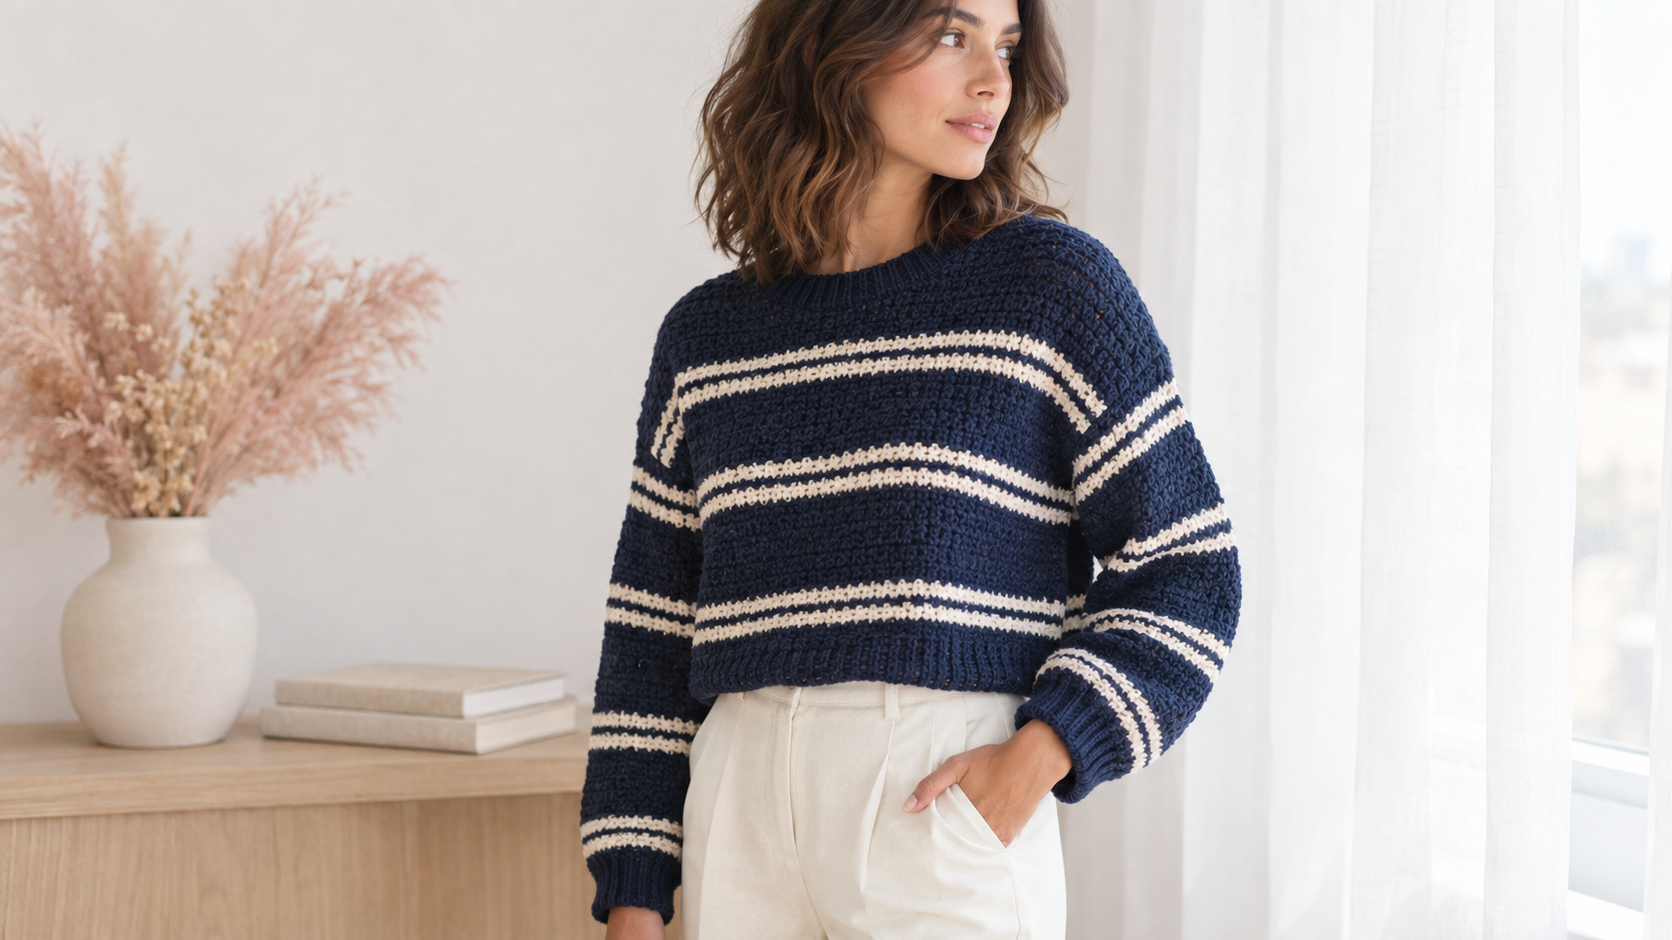
The easiest striped crochet sweater uses half double crochet, four rectangles, and a 6.5 mm hook — a drop-shoulder pullover you can finish over one weekend. Worked in worsted-weight yarn with 2-row navy stripes broken by 2-row cream accents, this cropped pullover has the knit-look texture of a boutique sweater and none of the intimidating garment shaping. Two panels for the body, two rectangles for the sleeves, ribbed cuffs and neckband, six clean seams. That's it.
Key Takeaways
- Free striped sweater pattern graded in 5 sizes (XS, S, M, L, XL) fitting 34–52 in bust circumference.
- Worked entirely in half double crochet (hdc) on a 6.5 mm hook with worsted #4 yarn. Ribbed cuffs and neckband use hdc in back loops only for a stretchy knit-look rib.
- 1,050–1,500 yd of worsted yarn total depending on size (XS–XL), roughly 70% navy and 30% cream. Two-panel drop-shoulder construction — no complicated raglan increases, no armhole shaping.
- Finishes in 12–18 hours over one weekend — the fastest wardrobe sweater in my rotation.
Pattern at a glance
- Stitch: half double crochet (hdc) in rows for body and sleeves. Back-loops-only hdc for cuff and neckband ribbing.
- Yarn: worsted #4 weight, 1,050–1,500 yd total depending on size (see size chart). Roughly 70% navy and 30% cream. Wool, cotton, or acrylic blend all work.
- Hook: 6.5 mm (US K/10.5) for the body and sleeves; 5.5 mm (US I/9) for the ribbed cuffs and neckband.
- Notions: tapestry needle, stitch markers (4), scissors, measuring tape.
- Construction: 2 rectangles (front + back) worked bottom-up in hdc → 2 tapered sleeves worked top-down in hdc → seam shoulders → attach sleeves flat to body sides → seam sides and underarms → add ribbed cuffs and neckband last.
- Finished sizes: XS (34 in bust) · S (38 in) · M (42 in) · L (46 in) · XL (52 in). Cropped length: 20 in (XS/S) / 22 in (M/L/XL).
- Time to complete: 12–18 hours over a weekend.
- Skill level: intermediate beginner — hdc, chain, sl st, back-loops-only, straight-seam mattress stitch.
Why a drop-shoulder rectangle sweater is the easiest first garment
Drop-shoulder construction is four rectangles. No raglan increases to track, no armhole decreases to shape, no set-in sleeve to ease. If you can crochet a scarf, you can crochet each panel. The oversized look is built into the geometry — you're literally sewing four flat rectangles into a boxy pullover, and boxy is exactly what's in fashion for 2026 knitwear.
I made my first drop-shoulder sweater the winter I was recovering from tennis elbow and couldn't hold my hook long. Four short evenings, four rectangles, one afternoon of seaming. I've worn it more than any other piece in my closet. The pattern below is that same construction, refined over three years of makes.
What you'll need
Yarn (worsted #4 weight, 1,050–1,500 yd total — see the size chart below for exact yardage per size)
- Navy (roughly 70% of total) — Lion Brand Wool-Ease in Navy, Paintbox Wool Mix Aran in Midnight Blue, or Hobbii Amigo in Navy Blue.
- Cream (roughly 30% of total) — Lion Brand Wool-Ease in Fisherman, Paintbox Wool Mix Aran in Vanilla Cream, or Hobbii Amigo in Off White.
Actual yardage varies with your row gauge, sleeve length, and tension. Always buy one extra skein per color as a safety margin — dye lots vary between purchases.
Both yarns must be the same weight and same fibre content to avoid uneven washing shrinkage. If you swap brands, weigh a swatch of each side by side before starting.
Hooks
- 6.5 mm (US K/10.5) — for the body panels and sleeves. A smooth aluminum head keeps hdc stitches even.
- 5.5 mm (US I/9) — for the ribbed cuffs and neckband. The smaller hook gives the ribbing snap-back.
Notions
- Tapestry needle, jumbo eye.
- 4 stitch markers (mark the shoulder seams and armhole placement).
- Measuring tape.
- Small sharp scissors.
Gauge
- 13 hdc × 10 rows = 4 in (10 cm) on a 6.5 mm hook.
- Ribbing gauge (5.5 mm hook, back loops only): 14 hdc × 12 rows = 4 in.
Gauge matters here. Unlike amigurumi, a sweater's fit depends on hitting these numbers. Crochet a 6-inch swatch in hdc before starting. If your row count is off by more than 1 row per 4 in, adjust hook size.
Abbreviations
- ch — chain
- hdc — half double crochet
- hdc2tog — half double crochet 2 together (decrease: yarn over, insert hook in next st, yarn over and pull up a loop, yarn over, insert hook in following st, yarn over and pull up a loop, yarn over and pull through all 5 loops on hook)
- sl st — slip stitch
- st(s) — stitch(es)
- BLO — back loops only
- rep — repeat
- RS / WS — right side / wrong side
Size chart
| Size | Bust | Length | Sleeve length | Total yardage |
|---|---|---|---|---|
| XS | 34 in | 20 in | 17 in | 1,050 yd |
| S | 38 in | 20 in | 17 in | 1,150 yd |
| M | 42 in | 22 in | 18 in | 1,250 yd |
| L | 46 in | 22 in | 18 in | 1,350 yd |
| XL | 52 in | 22 in | 18 in | 1,500 yd |
Instructions below are written XS (S, M, L, XL) in brackets. Circle your size on a printout before you start — that saves rework at row 40.
Stripe sequence
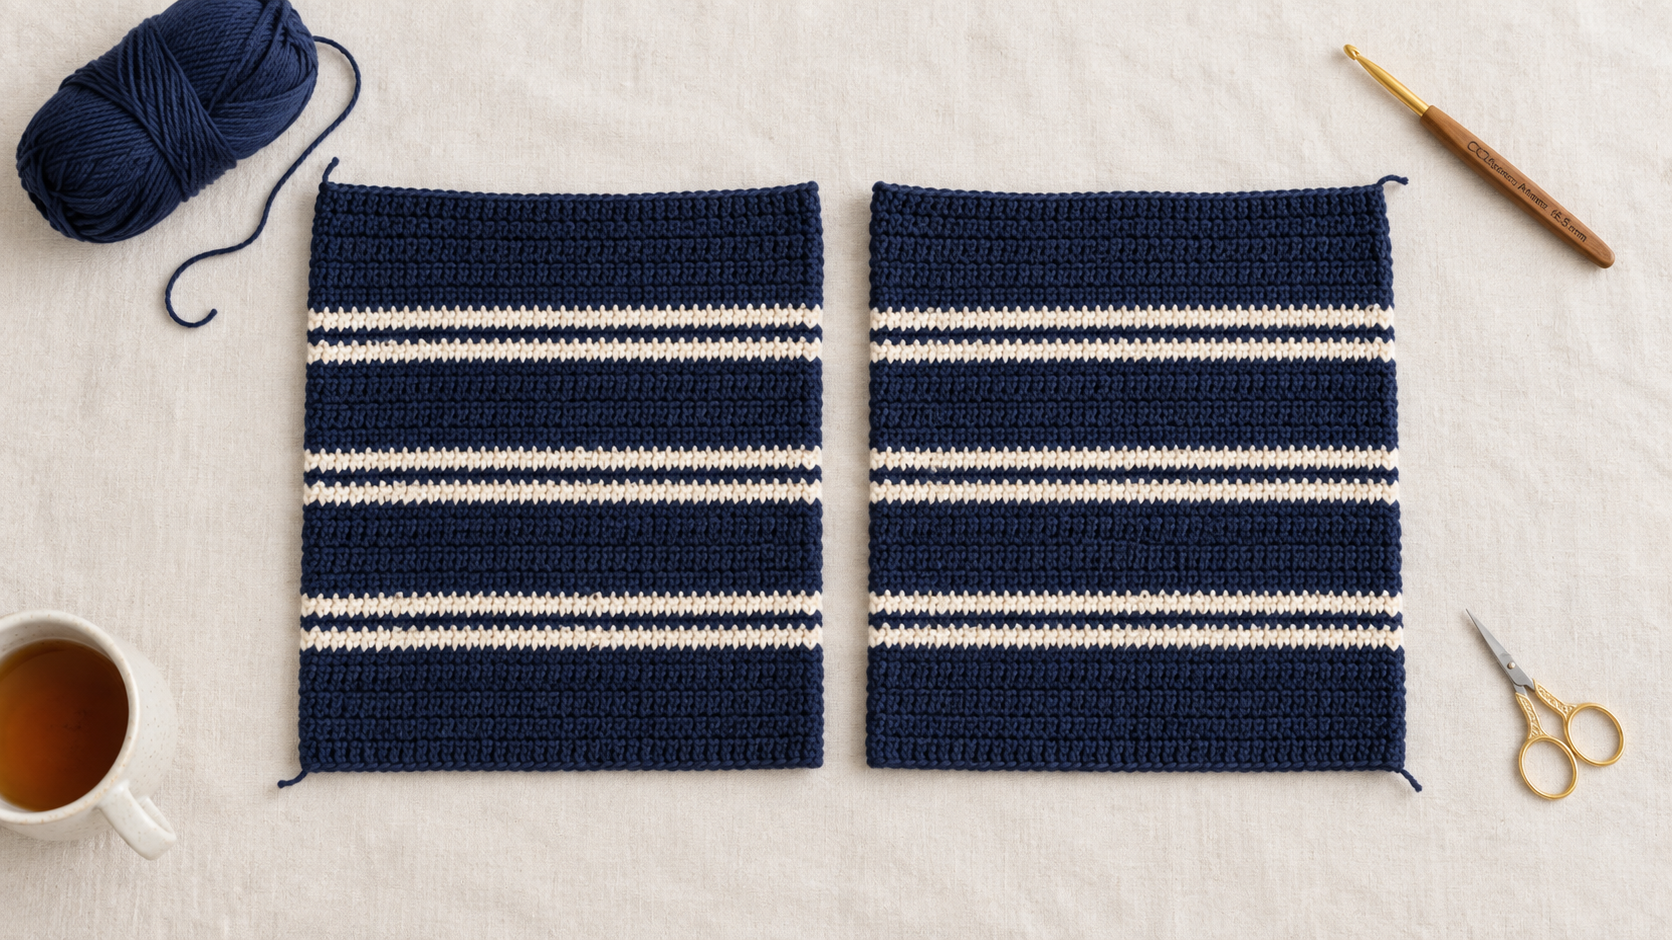
The signature 2-and-2 stripe: 2 rows navy, 2 rows cream, 2 rows navy, 2 rows cream — but with wider navy blocks between accents. The full repeat is:
- 8 rows navy
- 2 rows cream
- 2 rows navy
- 2 rows cream
- 8 rows navy
That's a 22-row repeat. When you change color, drop the old strand at the side edge (do not cut it) and pick up the new one — the unused strand carries up the edge and gets hidden inside the side seam. Only cut and rejoin every 22 rows.
Part 1 — The front panel
Worked bottom-up in rows with navy yarn, starting with a foundation chain.
Foundation: With 6.5 mm hook and navy, ch 58 (64, 70, 78, 86).
Row 1 (RS): Hdc in 3rd ch from hook and each ch across. Turn. (56 (62, 68, 76, 84) hdc)
Rows 2–8: Ch 2 (does not count as a stitch), hdc in each st across. Turn. (56 (62, 68, 76, 84) hdc)
Panel width per size: XS 17.25" · S 19" · M 21" · L 23.5" · XL 26" (at 13 hdc / 4"). Two panels give total bust: XS 34.5" · S 38" · M 42" · L 47" · XL 52".
End of navy block 1. Do not cut navy.
Row 9 (cream): Change to cream at the end of row 8 by pulling cream through the final yarn-over of the last hdc. Ch 2, hdc across. Turn. Row 10 (cream): Ch 2, hdc across. Turn. Change to navy.
Rows 11–12: Navy, hdc across each row.
Rows 13–14: Change to cream. Hdc across each row. Change to navy.
Rows 15–22: Navy, hdc across each row.
That's one full stripe repeat (22 rows). Continue the repeat until the panel measures 20 in (20, 22, 22, 22) from the foundation chain. Fasten off, leaving a 24-inch tail for shoulder seaming.
Part 2 — The back panel
Worked identically to the front. Same foundation chain count, same stripe sequence, same finished measurements. Fasten off, leaving a 24-inch tail.
Both panels stack perfectly aligned when you place them together with right sides facing.
Part 3 — The sleeves (make 2)
Worked as flat rectangles, worked from top of shoulder down to the cuff. This is the drop-shoulder trick — the top edge of the sleeve becomes the armhole, sewn straight into the side of the body panels.
Foundation: With 6.5 mm hook and navy, ch 60 (60, 64, 64, 68). This is the sleeve's top edge, which becomes the armhole seam.
Row 1: Hdc in 3rd ch from hook and each ch across. Turn. (58 (58, 62, 62, 66) hdc)
Sleeve top width per size: XS 17.85" · S 17.85" · M 19.1" · L 19.1" · XL 20.3". These match twice the armhole depth (see Part 4), so the sleeve top fills the armhole opening exactly.
Rows 2–3: Navy. Ch 2, hdc across.
Follow the same stripe sequence as the body: 8 navy, 2 cream, 2 navy, 2 cream, 8 navy.
Sleeve shaping (required, not optional). Beginning at Row 4, decrease 1 hdc at each end of every 3rd row (Rows 4, 7, 10, 13...) until the sleeve reaches the cuff stitch count for your size.
Per size, the total number of decrease rows is:
- XS: 13 decrease rows (58 → 32 hdc)
- S: 12 decrease rows (58 → 34 hdc)
- M: 13 decrease rows (62 → 36 hdc)
- L: 12 decrease rows (62 → 38 hdc)
- XL: 13 decrease rows (66 → 40 hdc)
To decrease at an end of the row: replace the first hdc of the row with an hdc2tog worked into stitches 1–2; work across in hdc as normal; replace the last hdc of the row with an hdc2tog worked into the second-to-last and last stitches.
Continue working the stripe sequence throughout the decrease rows. Once the target cuff stitch count is reached, work straight (no more decreases) until the sleeve measures 17 in (17, 18, 18, 18) from the foundation edge.
Fasten off, leaving a 20-inch tail for the underarm seam.
Part 4 — Assembling the sweater
The sweater has six seams total: 2 shoulder seams, 2 armhole seams, 2 side-and-underarm seams. Work them in the order below.
- Seam the shoulders (2 seams). Lay the front and back panels flat with right sides facing outward. Using the front panel's 24-inch tail and a tapestry needle, whipstitch across the top of the panels from the outer edge toward the center, working across 14 (15, 17, 19, 21) stitches on each side. This creates the two shoulder seams. Leave the center 28 (32, 34, 38, 42) stitches open — that's your neck opening. Total across the top edge per size: XS 14+28+14 = 56 · S 15+32+15 = 62 · M 17+34+17 = 68 · L 19+38+19 = 76 · XL 21+42+21 = 84 (matches the panel stitch count).
- Attach the sleeves (2 seams). Fold the sweater so front and back lie flat with right sides facing outward. Measure 9 in (9, 9.5, 9.5, 10) down each side from the shoulder seam and mark with a stitch marker — that's where the sleeve top edge will attach. The distance from the shoulder marker on the front to the shoulder marker on the back (measured over the shoulder seam) equals 18 (18, 19, 19, 20) in — twice the armhole depth — which matches the sleeve top width you crocheted. Pin the top edge of one sleeve rectangle to the body panel from the front marker, over the shoulder seam, to the back marker, easing evenly so the sleeve top edge lies flat against the body. Whipstitch with a separate 24-inch length of navy yarn. Repeat for the second sleeve.
- Seam the sides and underarm sleeves (2 seams). Fold each sleeve in half lengthwise and pin the underarm edges together. Continue pinning down the body sides from the underarm to the hem. Using the sleeve's 20-inch tail, whipstitch each side seam from cuff opening through the underarm and down to the hem in one continuous seam. Repeat for the second side.
- Weave in every end. Every color-change tail hidden inside the side seam gets woven through 6 stitches in two directions. This is where cheap-looking sweaters usually fail — take the ten minutes.
Part 5 — Ribbed cuffs (make 2)
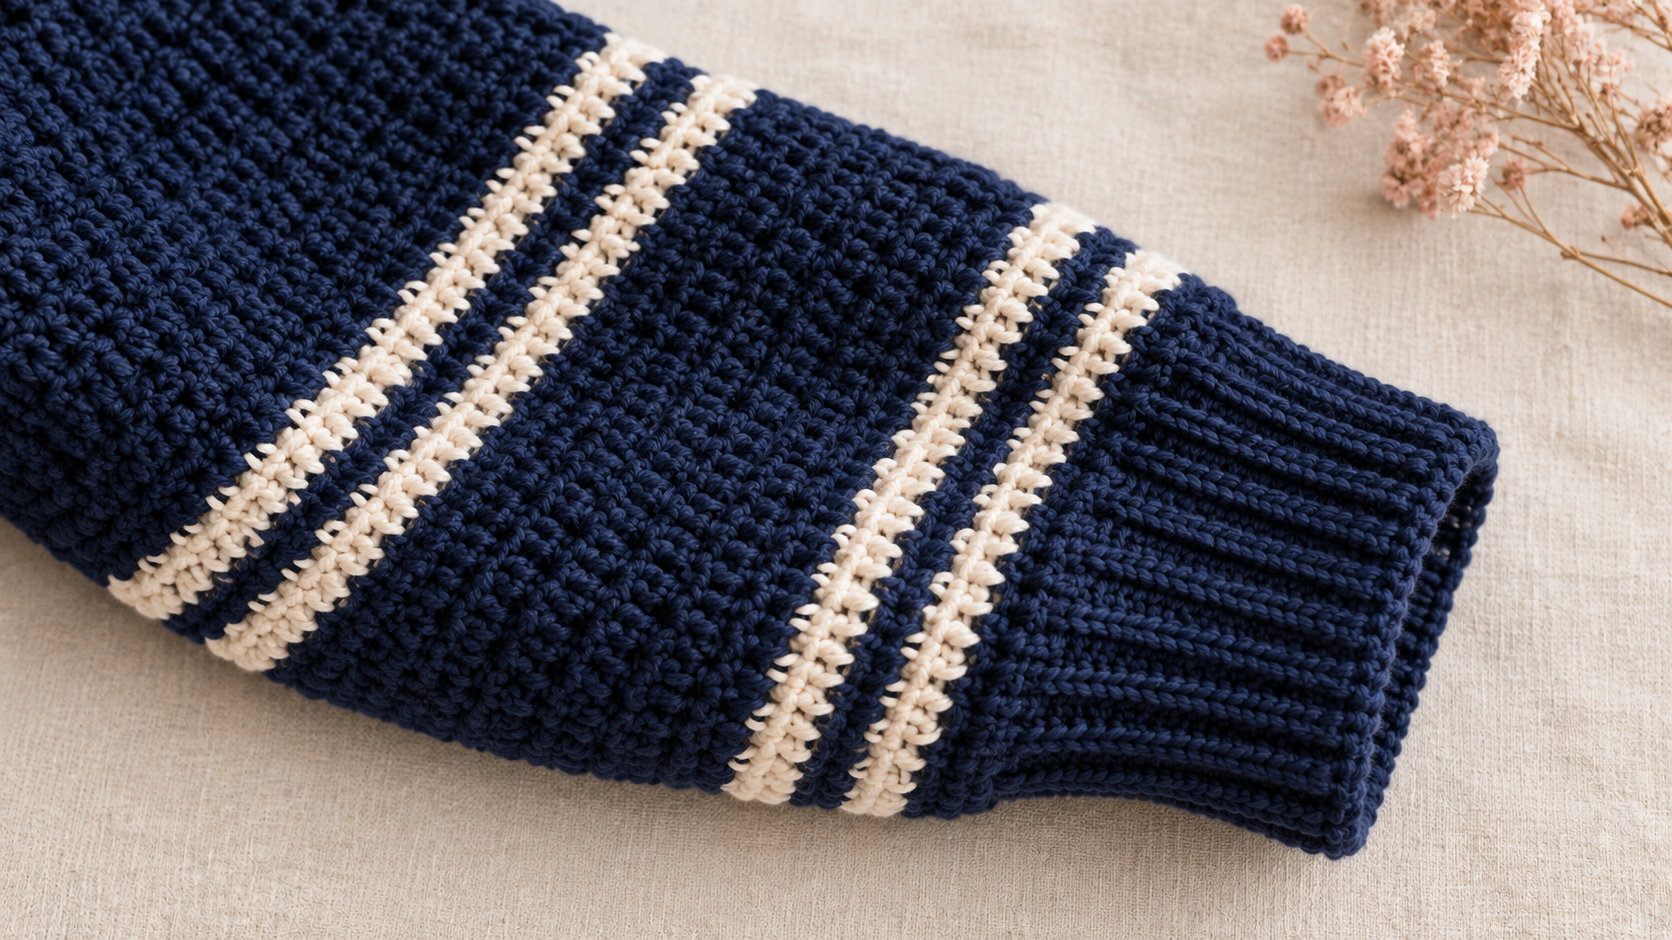
Switch to the 5.5 mm hook and navy yarn. The cuff is worked directly onto the sleeve opening, in rounds, using back-loops-only hdc for a stretchy vertical rib.
Round 1: With RS facing, join navy to the cuff opening. Ch 1. Work 32 (34, 36, 38, 40) hdc evenly around the opening. Sl st to first hdc to join. (32 (34, 36, 38, 40) hdc) Round 2: Ch 2, hdc BLO in each st around. Sl st to join. Rounds 3–8: Rep Round 2.
Fasten off, weave in ends. The cuff should hug the wrist snugly without cutting off circulation. Repeat for the second sleeve.
Part 6 — Ribbed neckband
Switch to the 5.5 mm hook and navy yarn. Worked around the neck opening, in the round.
Round 1: With RS facing, join navy at the shoulder seam. Ch 1. Work 56 (64, 68, 76, 84) hdc evenly around the neck opening — this equals the total stitches you left open across the front and back top edges: XS 28 front + 28 back = 56 · S 32 + 32 = 64 · M 34 + 34 = 68 · L 38 + 38 = 76 · XL 42 + 42 = 84. Sl st to first hdc to join. Round 2: Ch 2, hdc BLO in each st around. Sl st to join. Rounds 3–6: Rep Round 2.
Fasten off, weave in ends. Six rounds gives a mock-neck depth; stop at four rounds for a plain crew neck.
Finishing touches
- Steam block the whole sweater. With the sweater flat on a padded surface, hover a garment steamer 6 inches above every panel and seam. The stripes even out, the fabric relaxes, and the shoulders drop into the correct silhouette. Wool blocks best; cotton relaxes less but still benefits.
- Try it on before you weave the last two ends. If a side seam is puckering, unpick and resew. It's much easier to fix now than after wash one.
- Handwash the first time. Cold water, wool-friendly soap, squeeze out water in a towel, dry flat. That first wash sets every stitch.
Care instructions
Handwash cold, wool-safe soap, lay flat to dry. Do not tumble-dry — the drop shoulder loses shape in a dryer. Store folded flat, not hung; a hanger will stretch the shoulders permanently. Steam-block once a season to restore the silhouette. If you used a superwash wool or acrylic blend, gentle machine wash in a mesh bag is safe.
Troubleshooting the sweater
The stripes aren't lining up at the side seams. You worked one panel with an extra row. Count both panels row-by-row before seaming; add or remove the odd row before you sew.
The neckline gapes. The neckband needs more rounds. Add 2 more BLO hdc rounds to the ribbing. If it's still loose after that, the neck opening was seamed too wide — leave fewer stitches open on the next make.
The sleeves are too long. Roll the ribbed cuff up once — that's the intended look for a boutique cropped-sleeve fit. Otherwise, unpick the cuff, rip back 4 rows on the sleeve body, and reattach the cuff.
The fabric is too dense and stiff. Your hook is too small. Redo the swatch with a 7 mm hook and check the drape.
The color changes leave a visible line at the edge. You cut the yarn instead of carrying it. Only cut every 22 rows (one full stripe repeat); carry the strand between color blocks up the side.
Frequently asked questions
How much yarn do I need for a striped crochet sweater?
For a mid-size (M, 42 in bust) drop-shoulder pullover in worsted #4, you need about 1,250 yards total. This pattern uses roughly 70% navy and 30% cream because navy dominates the stripe sequence. Buy one extra skein of each color as a safety margin — dye lots vary between purchases.
Can I make this in one solid color?
Yes. Skip the stripe sequence entirely and work every row in navy. You'll need 1,150–1,500 yards total depending on size. Solid sweaters photograph beautifully in the same drop-shoulder silhouette and take about 10% less time (no color changes).
What's the difference between hdc and sc for a sweater?
Half double crochet (hdc) creates a taller, faster-growing stitch that reads as knit-like fabric. Single crochet (sc) makes a denser, stiffer fabric better for bags than garments. The photographed sample uses hdc for drape; sc would make the same pattern too rigid to wear comfortably.
Can I skip the sleeve tapering?
No — the taper from armhole to cuff is what lets a wide 58–66 hdc sleeve top narrow into a snug 32–40 hdc cuff. Without it, the sleeve would balloon at the wrist. If you want a straight tube sleeve instead, cast on 32–40 hdc for the cuff width, work upward without decreases to the armhole depth, and the sleeve top will be too narrow to fill the armhole opening — skip this pattern and look at a raglan construction instead.
Is this pattern suitable for beginners?
If you can crochet a scarf and change colors, yes. All you need to know before starting: chain, hdc, back loops only, and mattress-stitch seaming. Everything else is repetition. That said, budget a full weekend, not a single evening — a sweater is a marathon compared to accessories.
Related patterns from my hook
- The chunky striped scarf uses the same 2-and-2 stripe rhythm in a smaller weekend project if you want to test the palette first.
- The color-block cardigan shares the drop-shoulder rectangle construction if you want to build the same silhouette as an open front.
- The sage flare skirt pairs beautifully with this cropped pullover for a full handmade outfit in the same weight and fibre.
Ready to hook your striped sweater?
Save this pattern to your Pinterest board, grab your navy and cream worsted, and start the front panel tonight. If you finish one, tag me on Pinterest — I love seeing your color combinations. Navy and cream is the classic, but sage and cream, black and oatmeal, rust and cream, and forest green and butter yellow all read beautifully in this stripe rhythm.