Panda Keychain

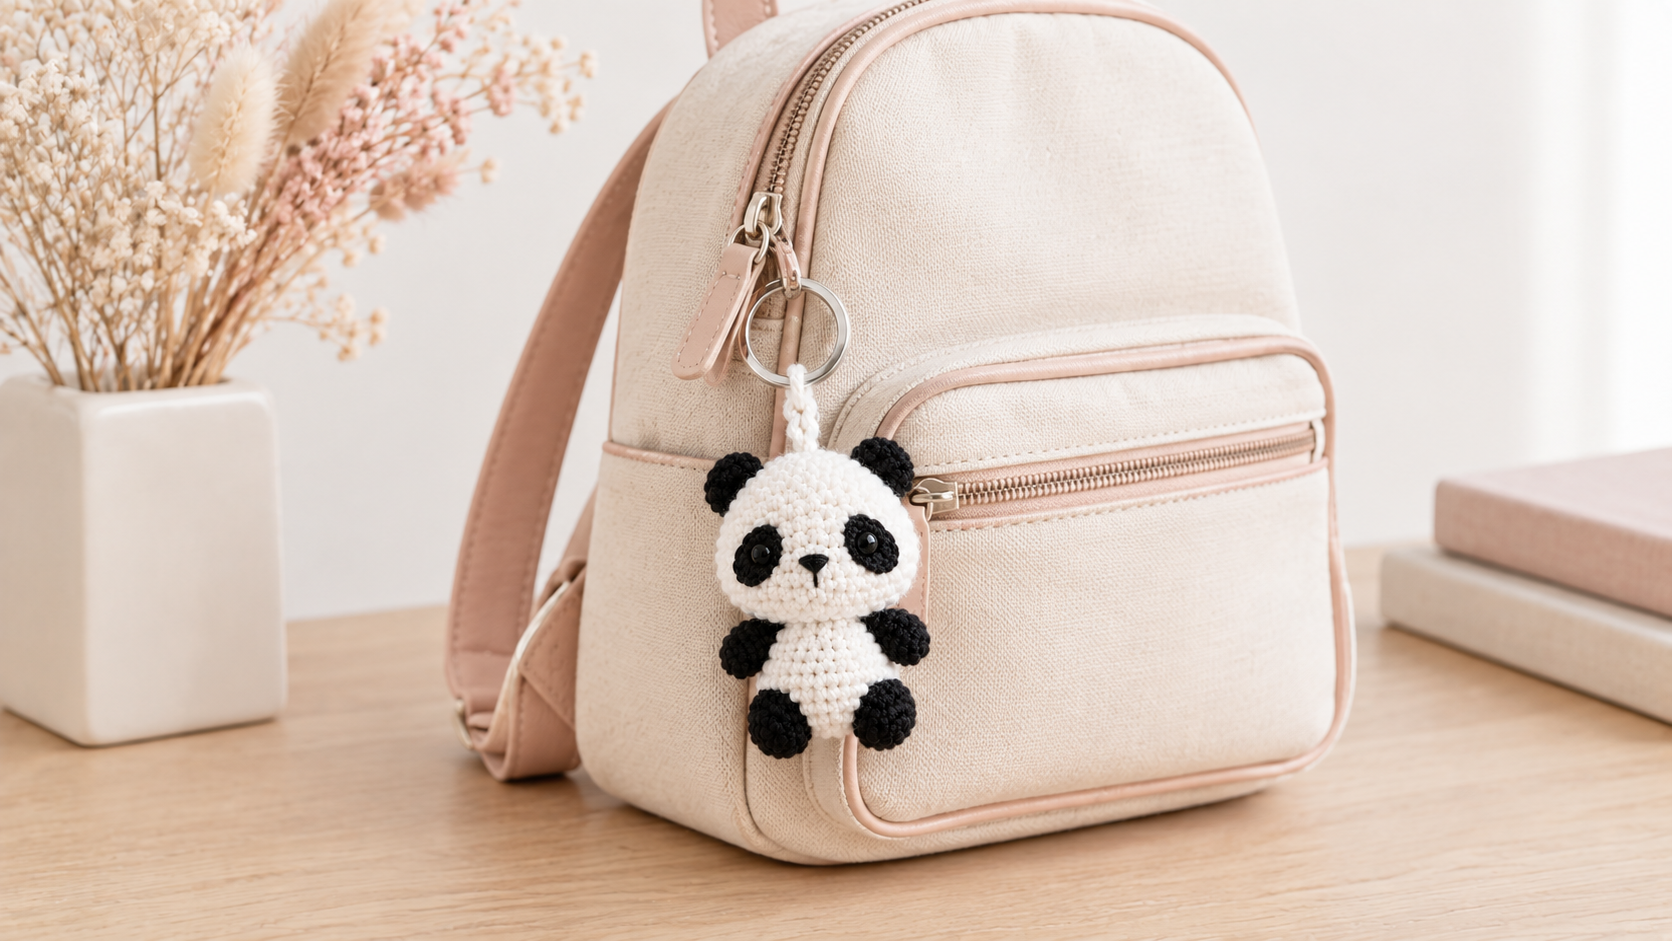
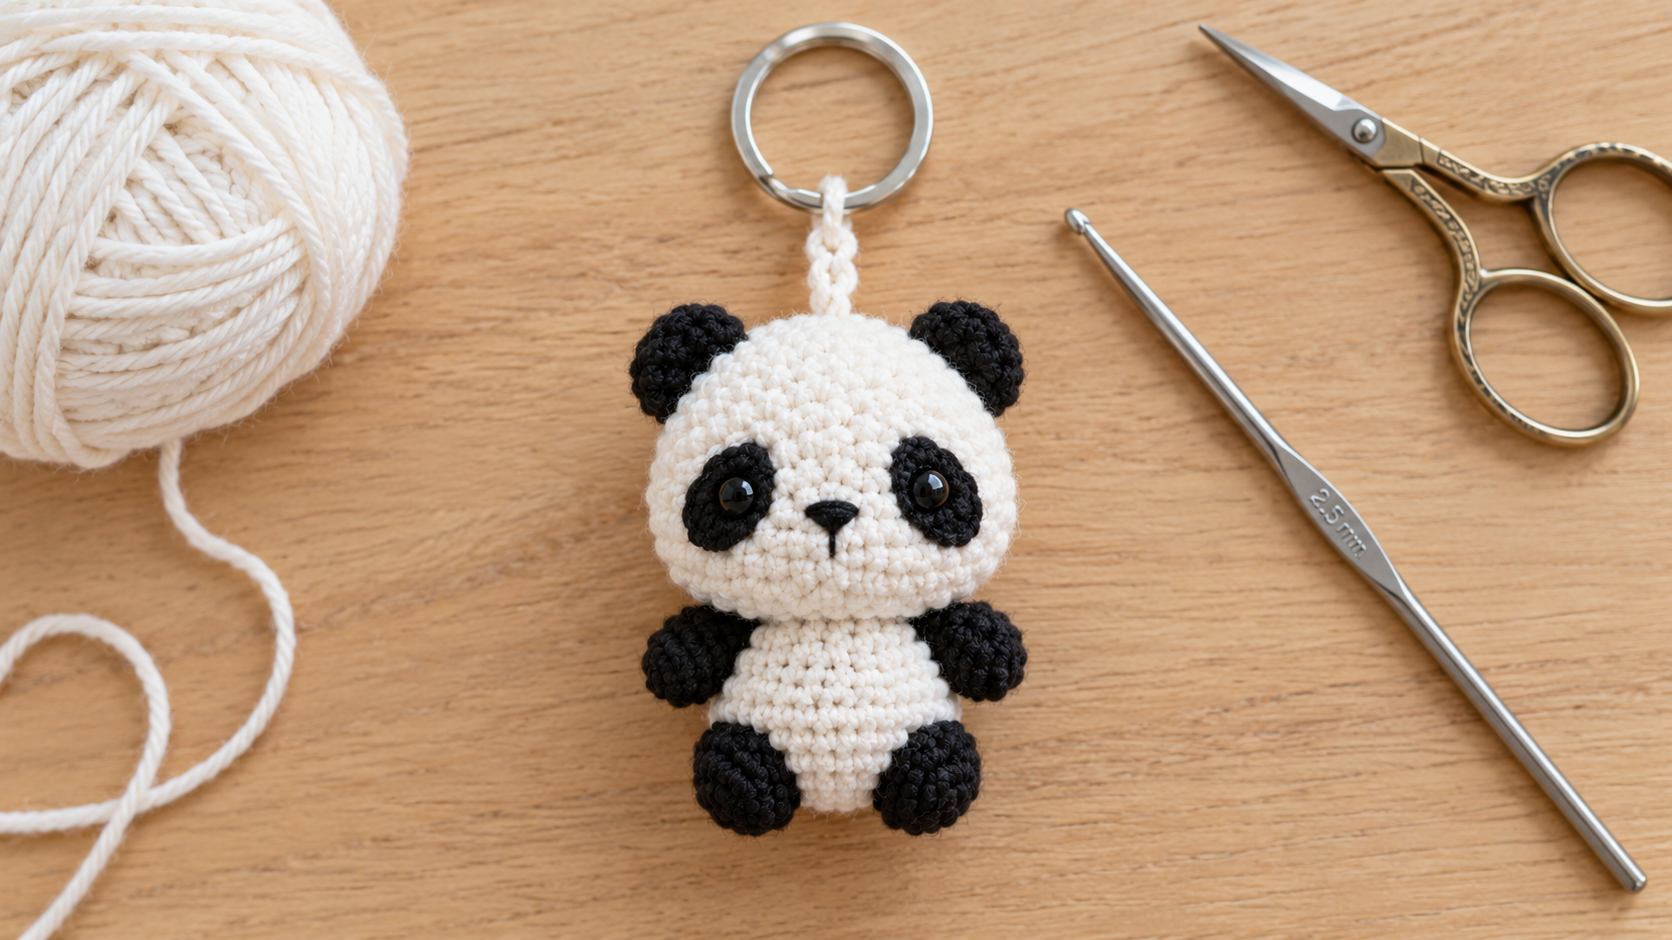
The easiest panda keychain uses 40 yards of DK cotton, a 2.5 mm hook, and single crochet in continuous rounds — a 3-inch chubby panda you can finish in one evening and clip to any backpack. Just five tiny pieces (head, body, two ears, one keyring loop) and you'll have a bag charm that looks store-bought but took less than two hours. A perfect palm-sized amigurumi for using up cotton scraps and gifting to friends.
Key Takeaways
- Panda keychain worked entirely in single crochet on a 2.5 mm hook — the small gauge is what keeps the amigurumi tight and detail-crisp.
- 5 pieces total: 1 head, 1 body, 2 ears, 1 short chain loop for the keyring. All pieces are securely finished and sewn together.
- 40 yd of DK #3 cotton total (25 yd white + 15 yd black) plus 2 × 6 mm safety eyes and one 25 mm split ring — everything fits in a snack-size bag.
- Finishes in 1–2 hours — the fastest amigurumi in my rotation and my go-to last-minute birthday gift.
Pattern at a glance
- Stitch: single crochet in continuous rounds throughout.
- Yarn: DK #3 weight cotton, 40 yd total (25 yd white + 15 yd black).
- Hook: 2.5 mm (US B/1 to C/2) — a metal hook gives the sharpest stitch definition at this gauge.
- Notions: 2 × 6 mm safety eyes (black), 1 × 25 mm split-ring keychain, small amount of polyfil stuffing, tapestry needle, stitch marker.
- Construction: head in the round from a magic ring at the crown → body in the round from a magic ring at the base → 2 ear buds flat → sew the head onto the top of the body, ears to head crown, chain loop through split ring to head crown.
- Finished size: approximately 3 in (7.5 cm) sitting height without the ring, depending on your tension; ~4.5 in (11.5 cm) with the split ring included.
- Time to complete: 1–2 hours.
- Skill level: advanced beginner — sc, magic ring, invisible increases and decreases, seaming at a small scale.
Why a keychain amigurumi is the perfect starter gift
Small-gauge amigurumi teaches you tension control faster than any full-size project. When your stitches are 2.5 mm apart, every loose loop shows — so you learn to pull tight without thinking about it within the first hour. That skill carries into every plush you make afterward. And unlike a full-size lamb or bear, a keychain uses one skein of cotton to make a dozen gifts.
I keep a Ziploc of finished panda keychains in my project bag. Every teacher gift, every "thanks for hosting" gesture, every birthday card I forgot to buy — one panda solves it. My niece asked me to make her whole soccer team last spring. Fifteen pandas in a weekend, and the coach still texts me about them.
What you'll need
Yarn (DK #3 weight cotton, ~40 yd / 37 m total)
- 25 yd white — Paintbox Cotton DK in White or Scheepjes Catona in Snow White (both are true DK #3 cotton).
- 15 yd black — Paintbox Cotton DK in Pure Black or Scheepjes Catona in Jet Black.
Avoid worsted-weight cottons like Lily Sugar 'n Cream for this pattern — they're a full weight thicker (#4) and will produce a bulkier panda that doesn't sit right on the keychain scale.
Hook
- 2.5 mm (US B/1 to C/2) — Clover Amour or Tulip Etimo Rose. Metal hooks slide through DK cotton at this size better than bamboo.
Notions
- 2 × 6 mm black safety eyes with washers.
- 1 × 25 mm silver split-ring keychain with a small lobster clasp or jump ring attachment.
- Small pinch of polyfil stuffing (about the size of a walnut, total).
- Tapestry needle, small eye.
- Stitch marker (1).
- Small sharp scissors and tweezers (for placing safety eyes at this scale).
Tension
Work tightly enough that the stuffing does not show through the stitches. If in doubt, go down half a hook size (2.25 mm) before starting.
Abbreviations
- ch — chain
- sc — single crochet
- sl st — slip stitch
- MR — magic ring
- st(s) — stitch(es)
- inc — 2 sc in same stitch
- dec — invisible sc2tog
- rep — repeat
Part 1 — The panda's head
Worked in continuous rounds with white yarn, starting from a magic ring. The magic ring will become the crown (top) of the head. The final closing round is the neck opening, which will sit against the top of the body.
Round 1: 6 sc in MR. (6 sts — this is the crown) Round 2: Inc × 6. (12) Round 3: Sc 1, inc. Rep 6 times. (18) Round 4: Sc 2, inc. Rep 6 times. (24) Rounds 5–9: Sc in each st around. (24 for 5 rounds)
Insert the 6 mm safety eyes between Rounds 7 and 8, on the front of the head, leaving approximately 4 stitches between the two eye posts. Tweezers help — the safety-eye posts are hard to grip at this scale.
Round 10: Sc 2, dec. Rep 6 times. (18) Round 11: Sc 1, dec. Rep 6 times. (12)
Stuff the head firmly with polyfil, using the tip of your hook to pack it in.
Round 12: Dec × 6. (6 — this is the neck opening)
Fasten off leaving a 10-inch tail. Thread the tail through the remaining 6 stitches and pull tight to close the neck opening. Weave the tail in — the head-to-body seam will be sewn with a separate length of white yarn.
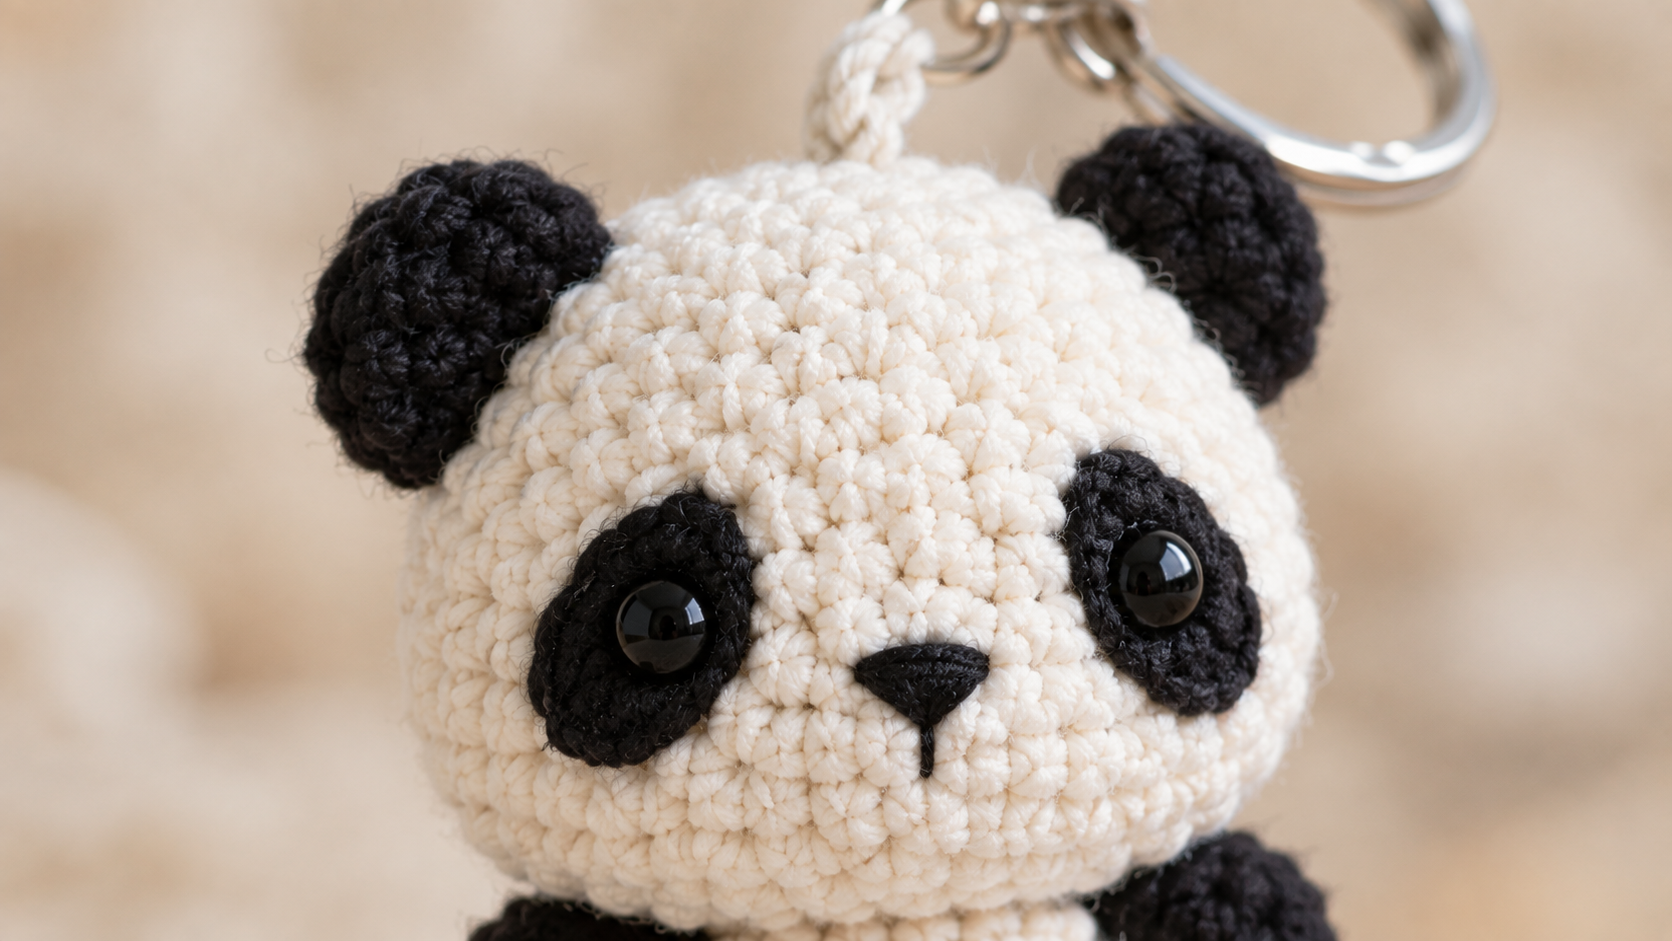
Embroider the muzzle and eye patches (this is what makes it a panda):
- With black yarn and a tapestry needle, embroider two black almond-shaped patches around each safety eye. Work the outline first (a small oval around each eye, tilted slightly outward like a panda's dark markings), then fill each patch with 3–4 satin stitches running in the same diagonal direction. The patch should extend about 1 stitch above the eye and 2 stitches below.
- Add a small black nose: 3 tiny satin stitches forming a triangle centered under the eyes, between Rounds 8 and 9.
- Add a single tiny straight stitch below the nose for the mouth. Two millimeters, no more.
The face is 90% of a panda keychain. Take your time here — a rushed face reads as a puppy, not a panda.
Part 2 — The body
Worked in continuous rounds with black yarn (the panda's classic dark torso). The magic ring will become the base of the body (where the panda sits). The final closing round is the top opening, where the head sits.
Round 1: 6 sc in MR with black. (6 — this is the base) Round 2: Inc × 6. (12) Round 3: Sc 1, inc. Rep 6 times. (18) Rounds 4–8: Sc in each st around. (18 for 5 rounds) Round 9: Sc 1, dec. Rep 6 times. (12)
Stuff the body lightly — you want it plush, not stiff, since it will hang.
Round 10: Dec × 6. (6 — this is the top opening)
Fasten off leaving a 10-inch tail. Thread the tail through the remaining 6 stitches and pull tight to close the top opening. Weave the tail in — the head will sit on top of this closed dome.
Part 3 — The ears (make 2)
Tiny black rounds, worked flat.
Round 1: 6 sc in MR with black. (6) Sl st, fasten off, leave a 6-inch tail. Do not stuff — flat ears sit better against the head.
Part 4 — Assembling the panda
- Sew the head to the body. Position the white head on top-center of the black body, with the face pointing straight forward. Using a separate 12-inch length of white yarn and a tapestry needle, whipstitch around the full base of the head, attaching it securely to the top of the body. Work about 10 small, even stitches around the seam. Pull the stitches snugly without flattening the head, then weave both yarn ends deep inside the body.
- Sew the ears on. Pin each black ear on top of the head, one on each side of the crown, angled slightly outward. Whipstitch each ear to the head using its 6-inch tail — about 5 stitches per ear, going through both the ear and the head so they sit firmly. Weave in the tails.
- Weave in every visible end. At this scale, one loose thread ruins the look.
Part 5 — Attaching the keychain
- With white yarn, make a foundation chain of 12. Sl st into the first chain to form a closed loop. Fasten off, leaving a 10-inch tail.
- Position the joined section of the loop at the top-center of the head, directly between the ears. Using the yarn tail and a tapestry needle, sew the joined section securely to the head with several tight stitches. Reinforce the attachment by stitching through the head twice. Weave the remaining tail securely inside the head.
- Thread the 25 mm split ring through the top of the crocheted loop. Rotate the split ring so its opening faces away from the panda's back — that keeps everyday snagging to a minimum.
Finishing touches
- Trim invisible ends. After weaving in every tail, snip flush. Fuzz kills the "boutique" look on a mini amigurumi.
- Test the swing. Hold the ring and let the panda dangle. If the head tilts oddly, the ears are asymmetrical or the neck seam is off-center — unpick and re-pin.
- Optional light steam. A quick pass with a garment steamer from 6 inches away smooths cotton stitches. Skip this if you don't own a steamer; it's a polish step, not a requirement.
Care instructions
Hand-wash only. Dunk gently in cool water with a drop of fragrance-free soap, squeeze between two towels, and air-dry flat. Do not tumble-dry — small amigurumi lose their shape in a dryer. Keep the split ring on a keyring pouch or the outside pocket of a bag; direct rain won't hurt cotton, but sun exposure over months fades the black to charcoal.
Troubleshooting the panda
The head sits crooked. The head-to-body seam was worked with the head tilted. Unpick and resew, holding both pieces vertically aligned before starting the whipstitch.
Stuffing shows through the white. The gauge is loose. Redo Part 1 with a 2.25 mm hook and the same stitch counts.
The face reads as a puppy, not a panda. The eye patches are too round or too small. Panda patches are almond-shaped and tilt outward — redo the patches with more definition and a slight outward angle.
The chain loop stretches out over time. Make a second chain-12 loop and sew it directly underneath the first for double load capacity, then thread the split ring through both loops together.
The ears face forward instead of upward. Move them one round back and pinch the base of each ear slightly before sewing so they cup toward the front.
Frequently asked questions
How long does one panda keychain take?
About 1–2 hours from magic ring to attached keyring. The head and face take the longest (roughly 45 minutes); the body, ears, and assembly finish in another 30–45 minutes. My personal best after making a dozen is 55 minutes flat.
Can I make this bigger?
Yes. Swap DK #3 cotton for worsted #4 and a 3.5 mm hook — the finished panda will land around 5 in tall and function as a small plush instead of a keychain. Skip the chain loop; add stubby legs like the chunky lamb plush instead.
Is 6 mm too small for the safety eyes?
At this gauge, 6 mm eyes are the sweet spot. 4 mm reads as dots; 8 mm covers half the face. If you can't source 6 mm, embroider two French knots with black yarn — the effect is softer but still clearly panda-eyed.
What if I want to skip the safety eyes?
For a child-safe version, embroider the entire face instead of using safety eyes: use two small black French knots for the eye centers, satin-stitched almond patches around them, a small satin-stitched nose, and a tiny straight-stitch mouth.
This project is designed as a keychain and contains small components, including the split ring, so it is not intended for babies or young children who may put small objects in their mouths. Always supervise children around small components.
Can I attach a bell?
Yes. Sew a small 8 mm brass bell into the middle of the chain loop before you attach the split ring. Muffled jingle every time the backpack swings. Cute, and useful if you tend to misplace bags.
Related patterns from my hook
- The barnaby teddy bear lovey uses the same magic-ring head at a larger gauge — the perfect next step up from a keychain.
- The chunky lamb plush shows how the same head-body-ears construction scales into full plush size.
- The piko the pond turtle amigurumi is another one-evening make if you want a second no-sew starter piece.
Ready to hook your panda keychain?
Save this pattern to your Pinterest board, dig out those cotton scraps, and start the head tonight. If you finish one, tag me on Pinterest — I love seeing the color variations you dream up. Classic black and white is iconic, but I've seen makers turn this base into a red panda (rust + cream + brown patches), a polar bear (all white + tiny black nose), and a cow (white + black patches instead of eye patches) with almost no changes.